Yeah it's Friday! This week I have a
special treat, not only am I revealing
Clue # 6 of my
Sunset on the Sound Mystery Series, but I'm hosting the
Studio 180 Design & Island Batik Twilight Chic Blog Hop.
Available today only, I'm offering the
free pattern, of the project, I selected to make with the
Twilight Chic Fabric, Deb Tucker’s signature collection for Island Batik, designed by Kathy Engle!
Let me tell you more about it. A few weeks back I was asked if I wanted to participate in the Studio 180 Design & Island Batik Twilight Chic Blog Hop, and of course I said yes! I love Island Batik fabric and the colors that Deb elected to be in her signature line.
I've been in my
"Timeless with a Twist" book mode, and I was working on one of the extra projects for the first book, the Spring Has Come Table Runner and thought to myself, wow, using the fabrics from Deb's collection would make a great Fall Has Come version!
So, when the fabric arrived last week, I got busy making it! I love how it turned out!
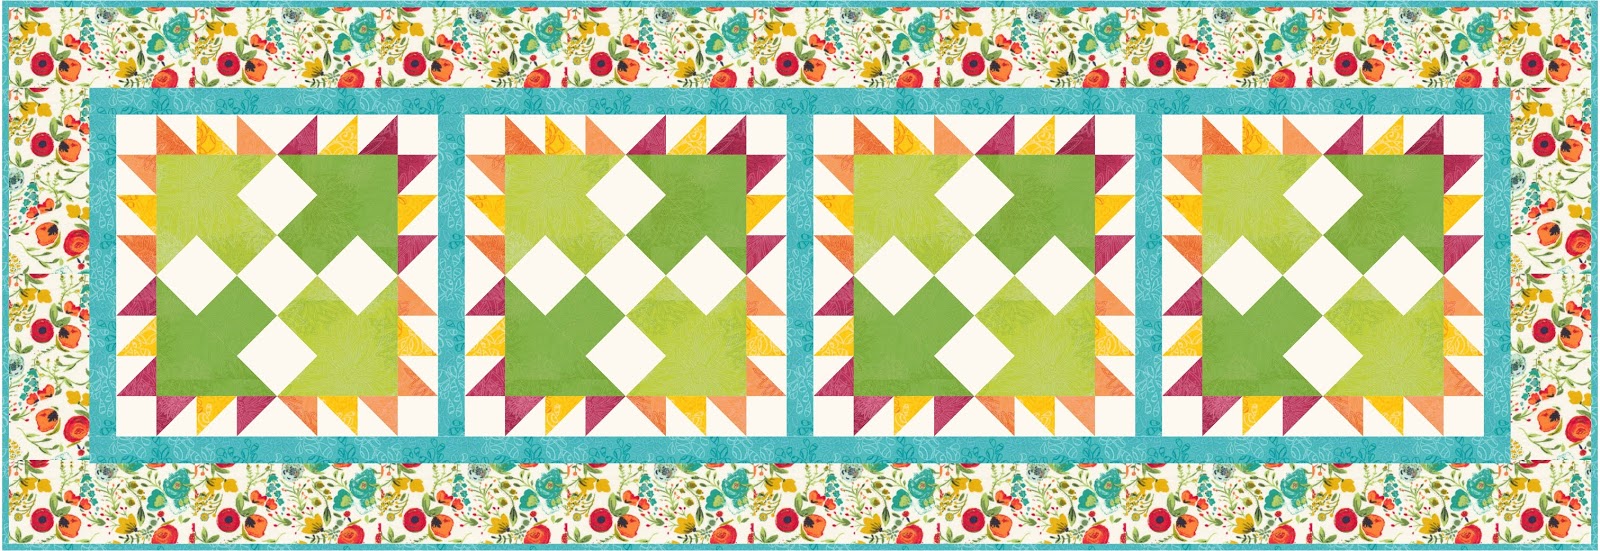
 |
| Fall Has Come by Michelle Renee Hiatt |
Let me take you briefly through how I made it. Below you will find general directions,
specific directions can be found in the download, through 6:30 am EST on Saturday, February 9th. After that, you will have to wait for the Book :) Note: If you haven't participated in my downloads before, you will need to
click on the word download above, and
scroll to the bottom of my Retreat page.
Fall Has Come Table Runner, which is actually and adaptation of Spring Has Come Table Runner, which will appear in
book one of my Timeless with a Twist book series, due out later this year.
 |
| Spring Has Come Table Runner |
To make this project you will need the following
Studio 180 Design Tools:
Tucker Trimmer 1,
Quilter’s Magic Wand, &
Large Square Squared.
For the Spring Has Come Block, I took a
Nine Patch and Squared it with the Large Square Squared.
1.
Gather the Background, Medium, and Dark Squares to make the Nine-Patch.
2.
Lay out the Squares as shown below. Stitch the squares into Rows, pressing towards the Medium and Dark Squares. Then, stitch the rows into Blocks, pressing the seam away from the center.
3.
To be a precise as possible, mark an extra diagonal line on Part A of the Large Square Squared to be used to trim the Nine-Patch units. On the back of Part A of your Large Square Squared tool, draw line intersecting the 45° angle line on the tool, for the Center Square for the proper Finished size, as shown in the diagram.
4.
Trim the Nine-Patch units with Part A of the Large Square Squared. The Nine-Patch will be slightly larger than the proper Finished Square Center window of the tool. Lay the oversized Nine-Patch on the cutting mat and center the unit, lining up the unit’s center square corners with the new diagonal line and the existing line intersecting the Center for proper Finished Center Window. Cut up the side and across the top to trim each square to a precision size.
 |
| 4. Right Handed |
 |
| 4. Left Handed |
5.
Lift the ruler and rotate the unit 180°, lining up the just cut edge with the Center for proper Finished size Center Window, the diagonally lines should fall back into place, intersecting the corners of the unit’s center square. Repeat until you have completed the Nine-Patch Center Squares.
 |
| 5. Right Handed |
 |
| 5. Left Handed |
6.
Gather the trimmed Nine-Patch Center Squares and the Half Square Triangles of both the Medium and Dark fabrics. These Half Square Triangles will become your Side Triangles. Stitch two Dark Side Triangles to two sides of Nine-Patch Center Squares where the dark square of the Nine-Patch unit resides. Make sure to place the Nine-Patch Center Square on the top when stitching your best ¼” seam allowance and press seams toward the Side Triangles. Trim the dog-ears to create a nice sewing edge and to alleviate bulk.
 |
| Make sure to match the Dark Side Triangles to the Dark patch in the Nine-Patch |
 |
| Sew the 1st Side Triangle on with the Nine-Patch on top |
 |
| Sew the 2nd Side Triangle on with the Nine-Patch on Top |
 |
| Trim the Dog Ears and lay out the next set of Side Triangles (M) |
7.
Stitch the Medium Side Triangle to the remaining sides of all Nine-Patch Center Squares, press seams toward the Side Triangles
 |
| Sew on the 3rd Side Triangle with the Nine-Patch on top |
 |
| Sew on the 4th Side Triangle with the Nine-Patch on top |
8.
Trim to proper size with your Part B of the Large Square Squared. Position Part B ruler over the pieced unit. Focus on aligning the tool’s “Xs” of the proper finished size unit over the sewn seams of the unit. Trim two sides.
 |
| 8. Right Handed |
 |
| 8. Left Handed |
9.
Lift the ruler and rotate the unit 180°. For the second cut, position the ruler on top of unit lining up the “Xs”, and then also lining up the cleanup lines on the ruler with the edges previously trimmed to the proper cut size.
 |
| 9 - Right Handed |
 |
| 9 - Left Handed |
10.
Repeat for all Nine-Patch Square² units.
 |
| 10. Right Handed - Perfect Nine-Patch Squared |
 |
| 10 - Left Handed Perfect Nine-Patch Squared |
You will need a lot of Half Square Triangles, so I used the Eight at Once Method for all three Sets:
11.
Gather the squares: to make the B, C, D units. Make sure you take the time to match them properly according to the
download.
12.
Mark and position Squares. On the wrong side of your square, mark two stitching lines ¼” on either side of the diagonal. Mark diagonals in both directions. Use the Quilter’s Magic Wand™ for this step. See the
download or the
Eight at Once Technique Sheet
13.
Layer your two squares right sides together, raw edges aligned and pin if desired. Stitch on all the drawn diagonal lines. Press flat to set the seams.
14.
Cut the square into 8 sections in the following
order:
a.
Once vertically at the half way measurement
b.
Once horizontally at the half way measurement
c.
On the diagonals between the stitching lines.
15.
Press seams to the darker of the fabrics.
16.
Position the Tucker Trimmer over the unit, carefully aligning the sizing diagonal line with stitched seam for the proper size square and trim one corner (two sides) to trim complete corner.
 |
| 16 - Right Handed |
 |
| 16 - Left Handed |
17.
Rotate the unit 180° and line up the Tucker Trimmer again and trim the two remaining sides to measure proper cut size.
 |
| 17 - Right Handed |
 |
| 17 - Left Handed |
18.
Repeat for all the units.
Next, you are going to Assemble Side Half Square into Pairs - pay very close attention to step 21 in the download.
You will need to press the seams open, so be sure to use a
Seam Stick, it will make your life so much easier, especially when you start to put the block together!
 |
| Remember to set in your seam |
 |
| Finger Press |
 |
| Press the seam open |
 |
| Set the seam from the other size |
 |
| Tada - Look how flat! |
Next, you will assemble the block, according to the
download, once again using the
Seam Stick, to make sure you don't upset the other seams when you go to press that seam open.
 |
| Take care to press the seams open using a Seam Stick |
Be careful not to reverse the Half Square Triangles

 |
| Once again, you are going to want to use your Seam Stick to press the seam open |
Complete all the blocks
Next sew the blocks together with the Sashing and apply the Border! I didn't have time, but you will want to layer, quilt and bind (I will be doing it shortly).
Woohoo!
Complete. This Table Runner is long enough to may a great Bed Runner as well!
There you have it!
Shown below on my quilt ladder. I really love how this turned out!
Be sure to
download this
Special Edition pattern, prior to 6:30 am, Saturday, February 9th!
Thanks to Studio 180 Design and Island Batik for providing such pretty fabric, it was extremely nice to work with. You can win you own set of fabric, for more information about your chance to win free fabric click on the link below. And just look at all those beautiful fabrics in the collection. Fabulous!

For the remainder of the Blog Hop schedule, see the end of my post!
Now for Clue #6 of my Sunset on the Sound Mystery Series!
Before I get started on
today's clue, if you are just joining us for the
Sunset on the Sound Mystery Series, you can get details on
Fabric Requirements or details on the series in my early blog posts: start with
Join Me for my Mystery Blog Post. Then go to Clue #1 Blog Post, Clue #2 Blog Post, Clue #3 Blog Post, Clue #4 Blog Post, and then Clue #5 Blog Post.
Also, if you want to join the Mystery series, make sure
you subscribe to my mailing list, to received my weekly newsletter announcing the clues:
Sign up for Mailing List
Okay, Clue #6! Split Rect! (Megan H will be happy) :)
Clue #6 - We will be using our
Color 2: Medium (M2) and Background (BG) to make Split Rect #1 units! You will need the Split Rects tool for this week's clue. If you do not have one, you can
purchase it in my Etsy shop.
 |
| Clue #6 ~ Sunset on the Sound Mystery |
Please see the
download for
specific cutting instructions, but
let me walk you through the process and provide a few extra tips that I share in the classroom (Make sure you check out my teaching/event schedules by following my retreats and events on Facebook-
Michelle's FB Event Page for the true interactive experience 😄).
1.
Gather the Color 2: Medium (M2) and Background strips. You will want to pair and Color 2: Medium (M2) and Background Strip on top of each other both
RIGHT SIDES UP! Very important! Right handers place strips horizontally on the cutting mat. Left handers place strips vertically on the cutting mat.
 |
| Take of the selvage |
2.
Position Split Rects ruler on the strip with the broad black line against the trimmed end of the strips and the proper finished size guide line along the raw edge of the strips.
 |
| 2 - Right Handed |
 |
| 2 - Left Handed |
3.
Trim along the slanted edge of the ruler to yield elongated triangles that will create rectangles when stitched along their long diagonal edges.
4.
Rotate the ruler one half turn (180 degrees) as shown in the illustration and align the small second trim “nub” line on the long edge of the strip and the “Second Trim” guide line along the just-trimmed edge of the strip.
 |
| 4 - Right Handed |
 |
| 4 - Left Handed |
5.
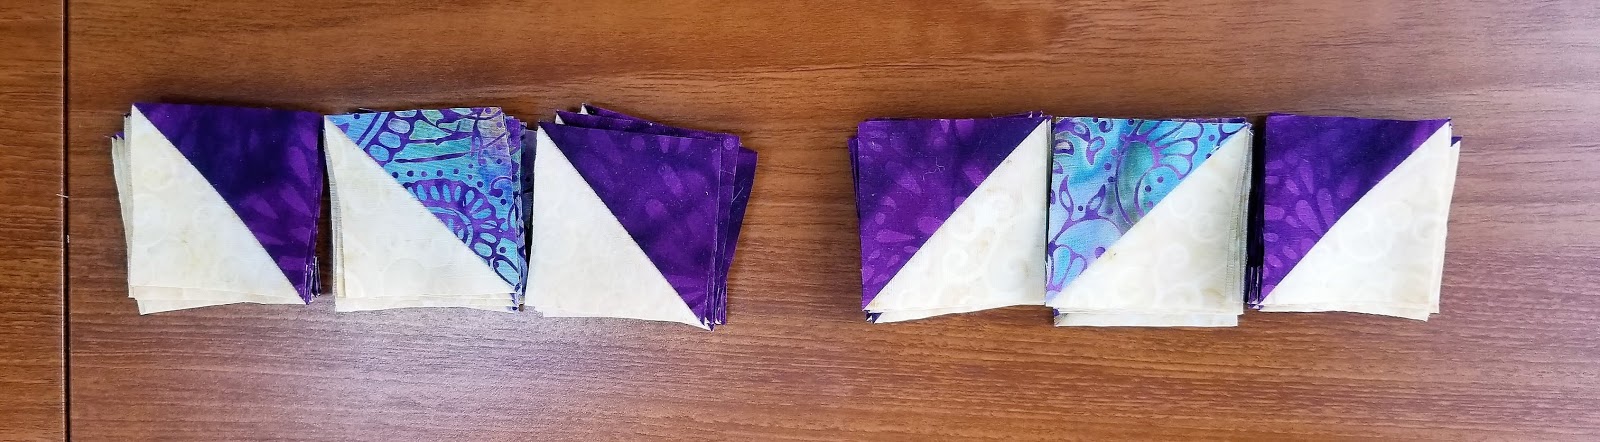
Trim along the straight edge of the ruler to create the next pair of elongated triangles. Continue to rotate the ruler to make one trim along the slanted edge and then one trim along the opposite straight edge to make all the required pairs of elongated triangles.
 |
| Lay out the units. |
NOTE: Be very careful if you are using solid or batiks, you will want to make sure you set this unit up properly, as it is easy to flip this if you are using fabric that is basically two-sided.
6.
Stitch the elongated triangles by placing them right sides together with the long, bias edge of the pieces aligned. Because they are oversized, there is no need for a lot of fuss. Center the two pieces with just a bit of overlap at the ends, but close is good enough.
7.
Press the seams either toward the darker fabric or open.
Recommend pressing the seams open to eliminate bulky seams. Consider using the
Seam Stick, it will help create nice flat open seams without ripples.
 |
| Remember to set the seam, then finger press open |
 |
| Press open |
 |
| Set the seam from the other side |
8.
Position sewn units on a cutting mat. For right hand cutting place units horizontally, for left hand cutting place units vertically.
9.
Align the “Common Diagonal” with the seam you have sewn. Check to make sure that the fabric unit is completely contained within the trim down lines for the proper finish size Split Rects™ unit.
 |
| 9 - Right Handed |
 |
| 9 - Left Handed |
10.
Trim along both edges.
11.
Rotate the fabric unit and reposition the ruler on top. Align finished size measurement with the trimmed corner and the same diagonal line used in the first trim, the cut size will be 1/2" larger on both sides of the measurement.
 |
| 11 - Right Handed |
 |
| 11 - Left Handed |
12.
Trim along both edges.
 |
| 12 - Right Handed |
 |
| 12 - Left Handed |
13.
Repeat for all Units. Label and place in a safe place.
14.
You are ready for the next clue! Please see the
download for specific cutting instructions and measurements!
That should do it for the Mystery. I love seeing everyone's work on the SOTS Facebook group.
Remember to continue to keep
Blog hoping, there are 2 more days! Here is the rest of the schedule!
TWILIGHT CHIC WEEK SCHEDULE
Monday, February 4
Tuesday, February 5
Wednesday, February 6
Thursday, February 7
Friday, February 8
Saturday, February 9
That should do it for today, I'm up at Quilting in Vermont for my Quilter's Choice UFO Retreat! We are already having a blast! Stay tune on my
Sew On the Go Facebook Page, to see all our progress and fun times!
Keep Stitching (and Blog Hopping),
Michelle


I love your project! Thank you for the pattern.
ReplyDelete