Glorious Splendor Reveal!
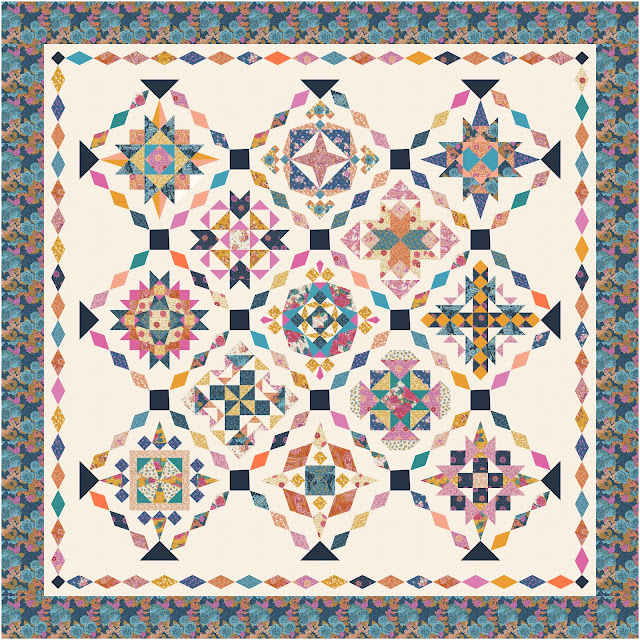
Well, it has been 18 weeks of Clues and we are at the reveal of my favorite Quilt Mystery to date! I absolutely love this Quilt. Here is Glorious Splendor.
 |
| Glorious Splendor - Paisley Rose version |
I hope with each Clue you learned something new and it was an inspiration to get you to the sewing machine weekly. I don't know about you, but whenever I look at my finished quilts, I always remember what I was doing as I made the quilt. Glorious Splendor will always remind me of all of you and our journey together but also of dealing with an aging parent, losing my dear Cal Pal, and battling Salmonella poisoning. But also great memories of a fabulous week in Maine with my husband, pups, and friends, plus a great week teaching in Lancaster, and finishing (or almost) the quilt at a Friends retreat at the Strong House Inn.
You will note in Illustrations that the Blocks are placed in different places, and that is by design, I want you to determine the best placement for your Blocks. There is no right or wrong, it is based on how you want to lay out your sampler. What looks best to you and with your blocks.
The assorted Diamond Rects in the Diamond Rects sashing will help bring it all together.
 |
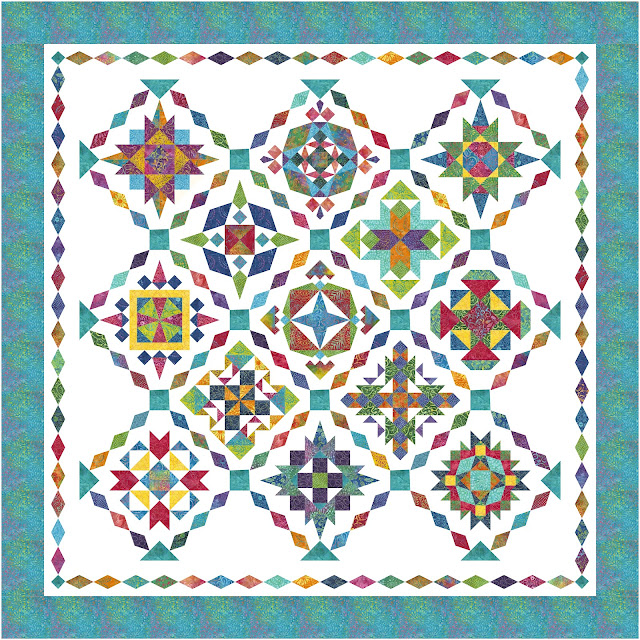
| Glorious Splendor - Bermuda Batik Version |
 |
| Modern Setting - Glorious Splendor - Paisley Rose version |
 |
| Modern Setting - Glorious Splendor - Bermuda Batik |
I know you will want to rush and get it done, but remember how much time you've put into it. Take your time and enjoy, it is a bit of work, but will totally be worth it.
You will want to take your time and follow the cutting for the Setting Triangles.
I like to press and fold my Large Squares in Half to do the long cut. Then unfold and perform the same cut.For your Corner Squares, you will only need to cut them once diagonally
The Sashing Setting Triangles are up to you, you can go with the Dark fabric you used in your Square-in-Square Cornerstones, or your Border Fabric, or any of the fabrics you have left. Or a mix of all of them. It really is up to you.
Gather your Diamonds and pair them. Follow the directions to make some of those into Sashing with the strips you cut in Clue #4 and the remainder into a Pieced Border. I choose to keep my in Clue Groupings as not to get overwhelmed but you can really make these as scrappy as you like.
Lay out your quilt and determine the best layout for your taste and your Blocks
Then you will sew them into Diagonal Rows, and the Rows into a Quilt Center.
You will need to trim down the center to 1/4" from the points. Start with your sides lining up the 1/4" with your seam intersections.
Then trim carefully, just point to point. Don't try and go too longI save my Corners for last and use the Tucker Trimmer III for this.
Then add your Borders (this is where I'm at). I will add a few final finish photos to this post once I'm home. I'm teaching at a Retreat in VT and want to finish the final Videos at home.
I will add some photos on placing the float, Diamond Border, and then Inner Border and Final.
I hope you love it as much as I do! I can't wait to hear what you think.
Keep Stitching,
Michelle


Comments
Post a Comment