Keeping Busy and Clue #9 Grand Central!
I hope everyone is well, taking care of themselves and keeping busy. These are trying times, but remember we are quilters, the strongest of the strong. Throughout my life, when times got tough, I’ve leaned on quilting and fellow quilters. Let’s do that! I have a few ideas!
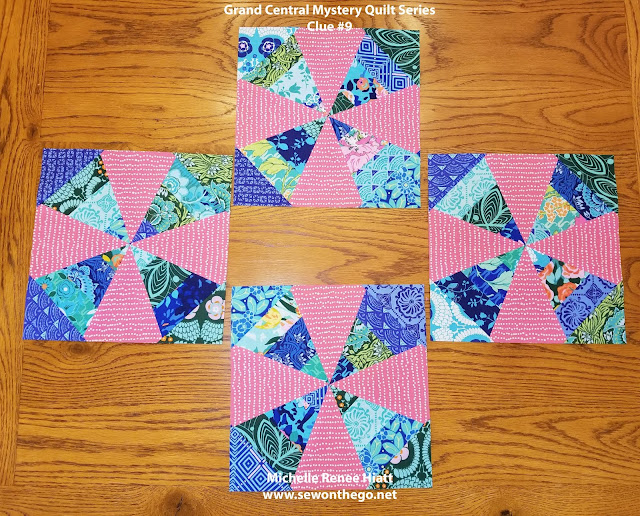
First, we are on Clue #9 of Grand Central Mystery Quilt Series! Here is a sneak peak, I have a step by step pictorial below, with tons of great tips, that will help you complete these awesome blocks.
 If you find yourself with extra time now, or love what you are seeing, and wish you had joined in the fun, now is the time to get caught up.
Special Sale on Clues #1-8
If you missed or lost Clue #1 - #8- You can purchase them for a nominal fee, for a limited time at: My Etsy Shop. In fact, I'm running a special through Monday, March 23rd.

33% off of prior Grand Central Clues!
You can purchase the Clues #1 - #8 for 33% of the normal nominal fee, for a limited time at: My Etsy Shop Use code CATCHUP through Monday, March 23rd.
Get all 8 clues for $16 with the CATCHUP code.
Another idea!
I’ve been thinking about a few things. If you don’t already, make sure to follow me on Facebook, on Instagram, and join my Sew on the Go Quilting Circle.

I have a few things popping around in my head. I’m thinking about doing a Tutorial Tuesday with one of my patterns.
Taking you from:

Perform your cutting covered in the download and gather the Viaduct Wedge Pairs from Clue #6.
 Next place the Viaduct Wedge Pairs into a half Block. The only rule I had, was I tried to avoid pairing them together if there was the same assorted bright... but I will be honest, I had to make a few concessions and when all is said and done, no one will notice.
You will need to start with the point, stitch one side with an accurate ¼” seam to create the half block. This is due to the fact that our outer edges may not be the same, so to get that perfect center, you will have to start with the point.
 You may want to start with a leader and I would pin.
 In fact, I would pin left handed, with a nice long pin, in the seam, about a 1/4" back so that you do not need to remove it when sewing.
Once you piece, set the seam.
 Place it over a Seam Stick, finger press and press. The Seam Stick is essential here, as you will need this seam FLAT.
 The Seam Stick allows the other seams to drop down, so you don't upset them, while acting as a tailors clapper and wicking the steam through to create a FLAT seam.
 Then press the front.
 Tada! Notice the perfect quarter inch intersection of the half. These is what your units will need to look like. If you have a scan quarter inch, the intersection will not be a true quarter. If you have a large quarter inch, your will lose your points.
 Next, lay out your halves, to ensure that you will be happy with the pairings. Again, depending on the number of fabrics you used, will determine how much variety you can have in your blocks. Notice, I have at least 2 of the same fabrics in this one, and all is good in the world. 😃 Don't over think.
 Next, you are going to want to precision pin these units together. See it. Flip it. Pin it. Do this by sticking a long fine pin through back of the top unit, through the "V" formed by your seam.
 Then place the pin through the front of the bottom unit where the seam intersect in the front "V".
 Next, place the unit over the end of your table, using your fingers make sure the pin is straight.
 Then "left-hand" pin two long pins beside the straight pin, not in the seam allowance, but just outside of it.
 Then, pull out the straight pin and stitch!
 You are going to want to set the seam, finger press and press the seam open on a Seam Stick.
 Then turn it over and give it a nice mist with Best Press. Flat, you want the block FLAT.
 Take you time with this next step. It is not a race, being accurate will ensure smooth sailing over the next few steps. You need to mark a halfway registration mark on all 8 wedges. For this use the centerline of the Wedge Star tool, placed it on the sewn seam with the point of the tool at the center. Mark a line, on the right side of the fabric with a removable marking tool.
 I like the Sewline pencils, as they give me a nice thin line, but after a few sewing sessions, the chalk is gone. You can draw the line at the end of the unit or a little in from the edge, either way it should be about 1 inch long.
Next, you will place your Wedge Octagon under the Tucker Trimmer III with the Strip Wedges in the North, South, East, West position.
 Take the time to line up the common diagonally through the pencil lines on the Accent #1 Wedge, and the proper size diagonally on the other set of Accent 1 Wedge's pencil lines.
 RIGHT HAND
Cut the Assorted Brights only. The side and top.
LEFT HANDED
Cut the Assorted Brights only. The side and top.
RIGHT HAND
Post-Cut.
LEFT HAND
Post-Cut.
BOTH - Lift the Tucker Trimmer III and turn the unit 180 degrees.
RIGHT HAND
Line up again
LEFT HAND
Line up again
RIGHT HAND
Cut remaining sides
LEFT HAND
Cut remaining sides
Tada!

Next, gather Corner Triangles and position a Corner Triangle right sides together with a Strip Wedge that was just trimmed. Align the raw edges and make sure that the triangle is roughly centered under the Strip Wedge.
Stitch with the Corner Triangle on the bottom.
 Repeat for all 4 Sides, and all the Viaduct Wedge Octagons.
This time, when we line up the Block to trim to perfect size, we will use the pencil lines on the Assorted Bright Strip Wedges
 Take time to make sure the common line and the proper size line cross in the middle of your block...
 while being on the Assorted Bright Strip Wedges.
 Now your Accent 1 Wedges should be in the North, South, East, and West position.
RIGHT HAND
Line up and cut the two sides.
LEFT HAND
Line up and cut the two sides.
RIGHT HAND
Post-Cut.
LEFT HAND
Post-Cut.
RIGHT HAND
Rotate 180 degrees, line up and cut remaining two sides.
LEFT HAND
Rotate 180 degrees, line up and cut remaining two sides.
TADA!
 How much do you love these! I'm thrilled with how this is going and hope you are too. Just you wait, you are going to love these next 3 clues!

Wrapping up for today, I know it is hard, but please stay positive and safe. Like many of you, most of my income relies on working outside the house, so, I know it is tough. However, we need to remember we have our health, family, friends, quilting…. Many of us have tons of stash that we should be putting to work.
If you are able, consider supporting those small business that have had to shut down. Many of the quilt shops I work with are taking phone and internet orders that can be mailed or picked up at designated times. If you need something, and can afford it, support those small businesses. None of them are going to mind you calling them to see if you can purchase something.
Please be safe, take care of you and yours! Tune in on Tuesday to my Facebook page.
Keep Stitching,
Michelle
First, we are on Clue #9 of Grand Central Mystery Quilt Series! Here is a sneak peak, I have a step by step pictorial below, with tons of great tips, that will help you complete these awesome blocks.

Special Sale on Clues #1-8
If you missed or lost Clue #1 - #8- You can purchase them for a nominal fee, for a limited time at: My Etsy Shop. In fact, I'm running a special through Monday, March 23rd.

33% off of prior Grand Central Clues!
You can purchase the Clues #1 - #8 for 33% of the normal nominal fee, for a limited time at: My Etsy Shop Use code CATCHUP through Monday, March 23rd.
Get all 8 clues for $16 with the CATCHUP code.
Another idea!
I’ve been thinking about a few things. If you don’t already, make sure to follow me on Facebook, on Instagram, and join my Sew on the Go Quilting Circle.

I have a few things popping around in my head. I’m thinking about doing a Tutorial Tuesday with one of my patterns.
Taking you from:
- How best to pick your color plan
- To pulling from stash
- How to augment with some purchases to get it over the line
- Good cutting skills
- Master marking skills
- Fabulous piecing skills
- Precision Pinning
- Perfect Pressing, etc.

This might actually push me to do one of my “stretch” goals this year and actually post some videos. I’d love to hear what you think. You will need to purchase the Pattern and I will probably host it in my Facebook Group Sew on the Go Quilting Circle. I'm still working out the details, but make sure to check in on Tuesday on my Facebook Page.
Grand Central Quilt Mystery - Clue #9
Woo hoo! We are making a Block, the Viaduct Wedge Block. Just wait to you see what I do with this block! You will need your Studio 180 Wedge Star and Tucker Trimmer III for this clue.
This clue is a little challenging, but review the pictorial below and you will be on your way to success. The pictorial will cover the technique and extra tips, but the details will be in the download.
Are you ready?

You will need to start with the point, stitch one side with an accurate ¼” seam to create the half block. This is due to the fact that our outer edges may not be the same, so to get that perfect center, you will have to start with the point.


 |
| Notice the pin position |


 |
| The line on my Assorted Bright Strip Wedge |
 |
| The line on my Accent #1 Wedge |


Cut the Assorted Brights only. The side and top.
 |
| Right Hand |
Cut the Assorted Brights only. The side and top.
 |
| Left Handed |
Post-Cut.
 |
| Right Handed |
Post-Cut.
 |
| Left Handed |
RIGHT HAND
Line up again
 |
| Right Hand |
Line up again
 |
| Left Handed |
Cut remaining sides
 |
| Right Handed |
Cut remaining sides
 |
| Left Handed |

Next, gather Corner Triangles and position a Corner Triangle right sides together with a Strip Wedge that was just trimmed. Align the raw edges and make sure that the triangle is roughly centered under the Strip Wedge.
Stitch with the Corner Triangle on the bottom.

This time, when we line up the Block to trim to perfect size, we will use the pencil lines on the Assorted Bright Strip Wedges


RIGHT HAND
Line up and cut the two sides.
 |
| Right Handed |
Line up and cut the two sides.
 |
| Left Handed |
Post-Cut.
 |
| Right Handed |
Post-Cut.
 |
| Left Handed |
Rotate 180 degrees, line up and cut remaining two sides.
 |
| Right Handed |
Rotate 180 degrees, line up and cut remaining two sides.
 |
| Left Handed |


Wrapping up for today, I know it is hard, but please stay positive and safe. Like many of you, most of my income relies on working outside the house, so, I know it is tough. However, we need to remember we have our health, family, friends, quilting…. Many of us have tons of stash that we should be putting to work.
If you are able, consider supporting those small business that have had to shut down. Many of the quilt shops I work with are taking phone and internet orders that can be mailed or picked up at designated times. If you need something, and can afford it, support those small businesses. None of them are going to mind you calling them to see if you can purchase something.
Please be safe, take care of you and yours! Tune in on Tuesday to my Facebook page.
Keep Stitching,
Michelle


I know this is a tough time for many. I'm so grateful we have your mystery series to look forward to each week!!! You are doing all of us a great service. As for videos... JUST DO IT! Starting is the hardest part. The more you do them, the better you will get. Good luck!
ReplyDelete