Holiday Extravaganza Clue #2 ~ Flying Triangles
Whew! What a week so far!
Apologies for my delay today, I'm moving a little slow this morning. I spent the last two days in Middletown, PA (just outside of Hershey) and got in a bit late last night. This weekend I'm heading up to the Twin State Modern Quilt Guild in Westminster, VT. By the end of the weekend I will have traveled through six states in 4 days!
Wednesday night I gave a lecture and trunk show to the Piecemaker Quilt Guild of Middletown, PA. Yesterday, I taught my Bloom Quilt Workshop to these fabulous ladies. Apologies, several of the ladies left by the time we thought to take a photo. Great times! Everyone enjoyed learning the S180 V Block and Square Squared.
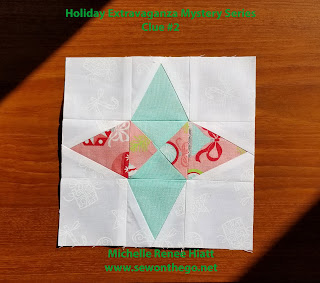
Now for Holiday Extravaganza! Clue #2 brings Block #2 ~ A variation on Flying Triangles.
Block #2 requires the S180 V Block and Tucker Trimmer III (or Tucker Trimmer I). We will be making V Block and Quarter Square Units to make the blocks. You will make 4 Blocks.
For my main Holiday fabric selection, I went with a Dark patterned Red, and a tone-on-tone Medium Blue.
For my Vintage Christmas fabric selections, I took the values down to Medium Red/Pink, that has a medium scale print, and paired it with a light blue solid.
Please see the download for specific sizes and cutting instructions, but let me walk you through the new techniques and provide a few extra tips that I share in the classroom (Make sure you check out my teaching/event schedules by following my retreats and events on Facebook- Michelle's FB Event Page for the true interactive experience).
Let's start with the V Block units, which will require your S180 V Block


I used a Magic Press Mat and Quilter's Fine Mist Spray bottle loaded with Best Press during my pressing process to help be get the best seams! Both are available in my Etsy shop.
Okay, now on for a few tips on the Quarter Square Triangle, using your S180 Tucker Trimmer III (or Tucker Trimmer I).


Apologies for my delay today, I'm moving a little slow this morning. I spent the last two days in Middletown, PA (just outside of Hershey) and got in a bit late last night. This weekend I'm heading up to the Twin State Modern Quilt Guild in Westminster, VT. By the end of the weekend I will have traveled through six states in 4 days!
Wednesday night I gave a lecture and trunk show to the Piecemaker Quilt Guild of Middletown, PA. Yesterday, I taught my Bloom Quilt Workshop to these fabulous ladies. Apologies, several of the ladies left by the time we thought to take a photo. Great times! Everyone enjoyed learning the S180 V Block and Square Squared.
 |
| Piecemakers Quilt Guild of Middletown, PA |
Now for Holiday Extravaganza! Clue #2 brings Block #2 ~ A variation on Flying Triangles.
Block #2 requires the S180 V Block and Tucker Trimmer III (or Tucker Trimmer I). We will be making V Block and Quarter Square Units to make the blocks. You will make 4 Blocks.
 |
| Clue #2 ~ Block #2 ~ Both of Michelle's Fabric Selections |
 |
| Holiday ~ Block #2 |

Please see the download for specific sizes and cutting instructions, but let me walk you through the new techniques and provide a few extra tips that I share in the classroom (Make sure you check out my teaching/event schedules by following my retreats and events on Facebook- Michelle's FB Event Page for the true interactive experience).
Let's start with the V Block units, which will require your S180 V Block
- Gather your Dark and Background (BG) strips for your A unit. Fold the end of the fabric strip, as shown in the illustration, ensuring the fold is deep enough to accommodate the slanted cut for the proper finished size unit and finger pressed the fold. Position the ruler on the strip so that the dashed line labeled “Fold Line for Center Triangle” is aligned on the fabric fold and the proper Finished size line of the ruler against the bottom edge of the strip.
- Trim along the slanted edge of the ruler
 |
| Right Handed |
 |
| Left Handed |
- Unfold to reveal the center triangle pieces.
 |
| Right Handed |
 |
| Left Handed |
- Flip the strip over. Align the center triangle trim line with the previously trimmed edge and cut your next pair of Center Triangles.
 |
| Right Handed - Flip North to South |
 |
| Left Handed - Flip East to West |
- Trim
 |
| Right Handed |
 |
| Left Handed |
- Continue flipping and cutting, until you have you the required amount.

- Gather the Background Strips and use the V Block ruler to precision cut pairs of Side Triangles. Fold the strip in half, wrong sides together on the cutting mat and clean up the selvage edge.

- Locate the bold solid line on the tool that reads “Cut Line for Side Triangles”. Position that line against the trimmed end of the strip with the top of the ruler against the top of the strip and the proper finished size line against the bottom of the strip.
 |
| Right Handed |
 |
| Left Handed |
- Trim along the slanted edge of the ruler as shown.
 |
| Right Handed |
 |
| Left Handed |
- To make the next cut, keep the fabric in the same position on the mat and rotate the ruler 180° as shown below. Position the extended diagonal line against the previously trimmed slanted cut.
 |
| Right Handed - Lined up with bottom of the strip - See Green Lines |
 |
| Left Handed - Lined up with the right side of the strip - See Green lines |
- Each cut will give you a mirror image pair of Side Triangles that will be sewn to both sides of the center triangle. Repeat until you have all the required pairs of Side Triangles. Lay out the V Block™ units. Make sure that you are lining up the long edge of the Side Triangles with the edges of the center triangle.
 |
| Long Sides together - It will create a Square |
- To sew. start sewing the left Side Triangle on first. Flip the center triangle onto top of the left Side Triangle, simply position pieces’ right sides together, lining up the slanted cut edges “tip to tip”. Stitch with the center triangle on top. Placing the center on top, while you sew will ensure you are sewing your best ¼” inch seam on the center unit. Press towards the Side Triangle.
 |
| Center Triangle on Top |
 |
| Chain piece |
 |
| Set in Seam |
 |
| Press- Finger Press - Press |
I used a Magic Press Mat and Quilter's Fine Mist Spray bottle loaded with Best Press during my pressing process to help be get the best seams! Both are available in my Etsy shop.
- Now stitch on the right Side Triangle. Lay out the Left/Center Triangle Unit with the right Side Triangle. Making sure you have it set up properly (to form a square). Flip the Left/Center Triangle unit onto the right Side Triangle, right sides together. Stitch with the Center Triangle on top and sew your best ¼” Seam.
 |
| Lay out the units again to make sure you have the proper orientation - SEE IT |
 |
| FLIP IT and SEW IT |
 |
| Set the Seam |
 |
| Finger Press and Press |
 |
| Tada - Perfect units that are slightly oversized |
To trim the sewn units, position them on a cutting mat as shown in the photo, aligning the proper “Finished Size” measurement with both of the seam lines, ensuring the “V” lines up. Trim along both edges.
 |
| Right Handed - V for the first cut |
 |
| Left Handed - Turn the V on it's side |
 |
| Left Handed |
- Rotate fabric unit 180° and reposition ruler on top. Align with the proper “Cut Size” measurements with previously trimmed corner and “X” with the sewn seam intersection. See illustration. Trim along both sides. Remember, the Cut Size of your unit will be 1/2” Larger than the Finished Size.
 |
| Right Handed - See the Green arrows |
 |
| Right Handed ~ Tada! Perfect |
 |
| Left Handed - See the Green Arrows |
 |
| Left Handed ~ Tada! Perfect |
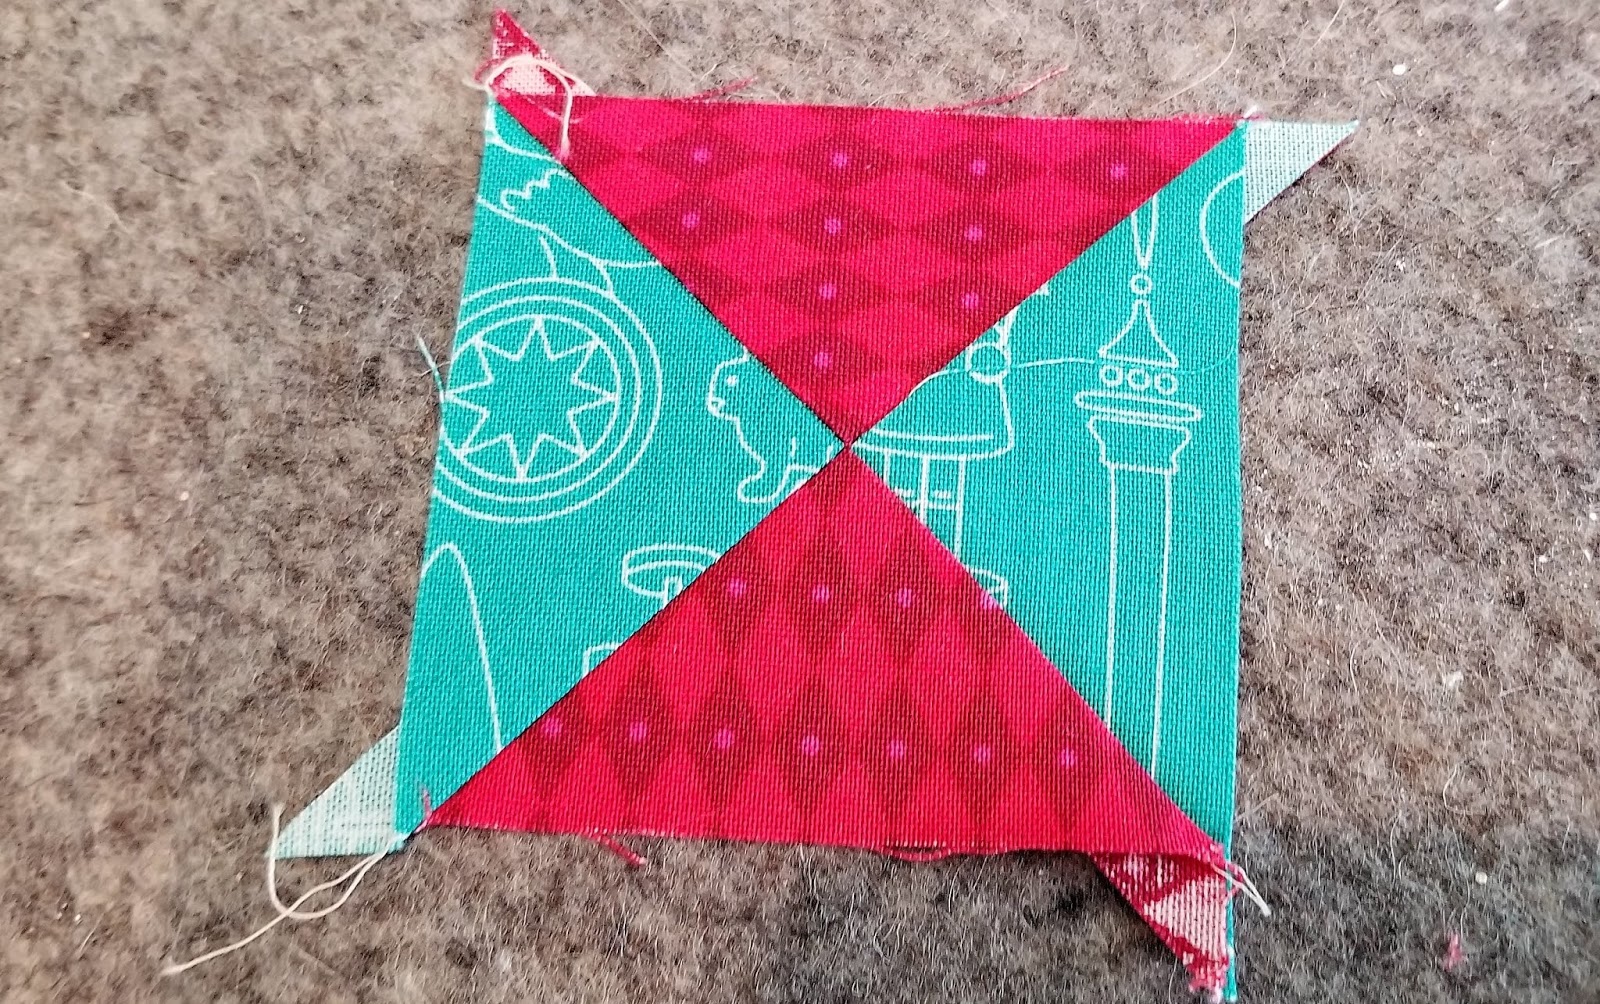
Okay, now on for a few tips on the Quarter Square Triangle, using your S180 Tucker Trimmer III (or Tucker Trimmer I).
- Use a Quilter’s Magic Wand to draw 2 sewing lines for wrong side of your Medium Triangles. Get the line nice and tight to the wand, and use a fine marking instrument to mark those lines. I love the Sewline pencils, they are ceramitized chalk that provide a nice fine line for you to sew on, but that eventually flakes off, and therefore doesn’t damage your quilt. They come in 5 colors and are great! Make sure to take the time to draw the 2 lines, you will be much more accurate than with just drawing 1 center line and gauging ¼” on both sides of that line.


- Use a nice open foot, so you can see where you are sewing. I use my Star foot, on my Pfaff, and love it!


- Once you sewed, cut, and pressed, you are going to draw those 2 lines in the opposite direction.

- Make sure to pair the mediums opposite of each other and NEST those seams.

 |
| I always sew the with top seam away from me, so that my feed dogs work for me, keeping those seams nested. |
- Swirl those seam intersections of those quarter square triangles, your blocks will lay much flatter.
 |
| Swirl |
 |
| Press. Creates this little four-patch on the back |
 |
| Give a good press from the front as well |
- Take the time to lay out your units, to make sure you have the units (colors) in the proper place before your sew your block together. Even consider taking a picture, you will be surprised how much more you see in a photo than purely looking at the units.
- Line up your Tucker Trimmer III or I and trim
 |
| Right Handed ~Trim |
 |
| Rotate 180 and Trim |
 |
| Tada! |
 |
| Left Handed ~ Trim |
 |
| Rotate 180 and Trim |
 |
| Tada! |
- Lay out your block and double check orientation!

- Sew into Row, following pressing in the download. When you sew your rows together, you will want to press the seams open using the pressing seam stick, you will love the results!


Whew! You made it through another Clue! Make sure to label and store!
Sorry for the delay again! Crazy week.
I'm off to continue unpacking, repacking and will be hitting the road again giving a different lecture and trunk show this Sunday to the Twin State Modern Quilt Guild. Visitors are welcome. See the details below.
 Keep stitching and don't forget to share your blocks in the Holiday Extravaganza Facebook Group.
Michelle
|
| Clue #2 ~ Block #2 |
I'm off to continue unpacking, repacking and will be hitting the road again giving a different lecture and trunk show this Sunday to the Twin State Modern Quilt Guild. Visitors are welcome. See the details below.

Michelle


Comments
Post a Comment