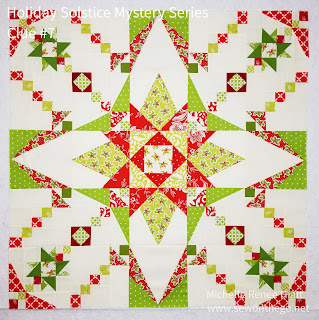
Holiday Solstice Clue #7 - More revealed!
Welcome to Holiday Solstice Week #7! We are just pasted one third of the way through and we are putting our Round A Borders around the center of the Holiday Solstice Medallion Center!
So, for this week's Clue, you will make four more Go Jingle By Blocks. I'm going to refer you to Clue #5, if you need help with the technique's within this block. See my Sew on the Go Blog Post #5 for help. I elected to use the same fabric. You could use different fabric, but I would try and use the same color and value.
You will be using the Tucker Trimmer to make Shaded 4-Patch units. Optionally, you can use the Four-Patch Square Up to make the Four-Patch units.
Once again, I do want to mention that you want to be careful with your pressing. If your block has "ripples" you want to consider improving your pressing skills. Pressing can really take your blocks to another level so I'm going to cover that today. So please check out the tips below. It will be especially important for the next step.
Assemble Round A Border Strips and Apply to the Medallion Center - PIN and PRESSING will make a difference!
Remember details are in the Download, but please read these tips, they are not in the clue as they need pictures to help you best.
- Many of you may want to see the beautiful photo of my Medallion Center or the diagram in the download and rush to put this together.
- Please read through the instructions.
- It is best to put these together as Borders.
- Making 2 of the side borders and 2 of the top/bottom Borders.
 |
| Lay out your Borders and take a photo. Look at the photo and make sure you have the proper orientation |
 |
| Use your BEST pressing skills - Set the seam |
 |
| Finger press |
 |
| Then press on a Seam Stick |
 |
| Turn over and press from the front |
 |
| When you have your Borders complete, give the a mist of Best Press and a good press. You should not have ripples in your seam. If you have ripples and you did not use a Seam Stick, now would be the time to invest. This is just the first set of rows to go on this quilt. It is a great investment and it will help. |
 |
| Lay out your Round A Strips and double check all the Blocks before sewing on your Side Borders. |
 |
| It is important to pin at all the place you have pressed open, plus to match points, similar to how I showed you in Clue#5. |
 |
| Left handed pinning will help you keep the pins in longer to ensure a perfect match. |
 |
| Again, set the seam, finger press and press on the Seam Stick, it helps to have a 24" Seam Stick. |
 |
| Give it a nice press from the front and continue with the other Side Border, then Top and Bottom. Make sure to check our orientation between Borders. |
 |
| Tada! You have to love it! I know I do. |


truth, I know I've jump into make something, only to go back to directions I skipped over and had to rework the project. Your directions are so fantastic, and all the images make it fool proof! Thanks for this
ReplyDelete