Yeah, it's Friday and time for another clue in Sunset on the Sound Mystery!
How are you all doing? Did you finish Clue #1?
We had over 500 Clue #1 downloads last week and almost 200 members in our
Sunset on the Sound Facebook group! Based on the
SOTS Facebook group, a good portion of participants have completed the first clue.
I shared this remark in the
SOTS Facebook group, and it is a bit of a little tease, but I love this quilt so much, I'm hunting for another yard of my background fabric to make my Throw a Queen! I had enough of everything to get me there but the background. I thought I found it, but it turned out to be to white, despite the photos, my background is more cream. Still on the hunt! I know you all can relate. We've all been there one time or another right?
Before I get started on today's clue, if you are just joining us, you can get details on
Fabric Requirements or details on the series in my early blog posts: start with
Join Me for my Mystery Blog Post. Then go to Clue #1Blog Post.
Okay, Clue #2! Probably my favorite unit after Lemoyne Star
, the V Block!
Clue #2 - We will be using our
Medium of Color 1 and Background Fabric to make V Blocks! You will need the
V Block tool for this week's clue. If you do not have one, you can
purchase it in my Etsy shop.
Please see the
download for specific cutting instructions, but
let me walk you through the process and provide a few extra tips that I share in the classroom (Make sure you check out my teaching/event schedules by following my retreats and events on Facebook-
Michelle's FB Event Page for the true interactive experience).
1.
Gather your Medium (M1) and Background (BG) fabric and follow the directions in the
Download to cut your strips for the V Block unit, plus the Background Rectangles.
2.
Fold the end of the fabric strip, as shown in the illustration, ensuring the fold is deep enough to accommodate the slanted cut for the proper finished size unit and finger pressed the fold. Position the ruler on the strip so that the dashed line labeled “Fold Line for Center Triangle” is aligned on the fabric fold and the proper Finished size line of the ruler against the bottom edge of the strip.
 |
| 2 - Right Handed |
 |
| 2 - Left Handed |
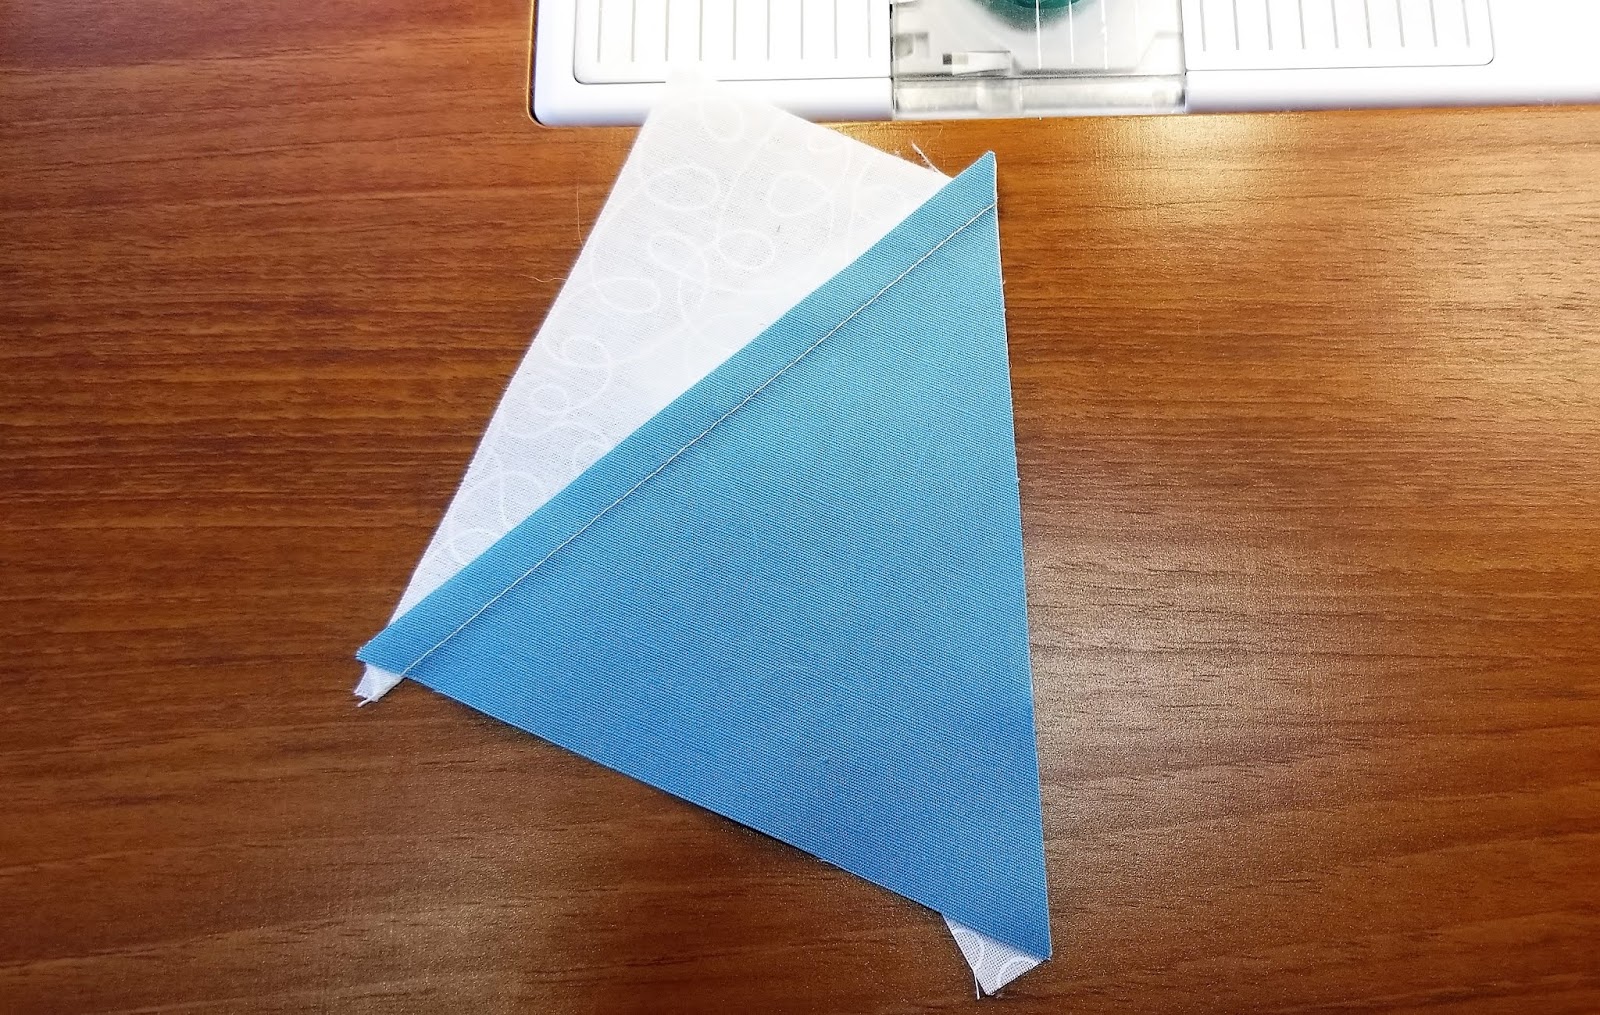
3.
Trim along the slanted edge of the ruler and unfold to reveal the center triangle pieces.
 |
| 3a - Right Handed |
 |
| 3b - Right Handed |
 |
| 3a - Left Handed |
 |
| 3b - Left Handed |
4.
Move the cut triangles off to the side and flip the strip over as shown below. Flip top to bottom if you’re right handed, west to east if you’re left handed.
5.
Align the center triangle trim line with the previously trimmed edge and cut your next pair of Center Triangles.
 |
| 5a- Right Handed |
 |
| 5b - Right Handed |
 |
| 5a - Left Handed |
 |
| 5b - Left Handed |
6.
Continue to flip the strip for each cut. Use these key words: Flip - Position - Cut - Flip Again until you have the all the Center Triangles.
 |
| Note: You can usually get one more unit at the end of the strip, on the fold, using the dotted line on the V Block |
7.
Gather the Background Strips and use the V Block ruler to precision cut pairs of Side Triangles. Fold the strip in half, wrong sides together on the cutting mat and clean up the selvage edge.
 |
| Very Important - Folded Strip - Cut off the selvage |
8.
Locate the bold solid line on the tool that reads “Cut Line for Side Triangles”. Position that line against the trimmed end of the strip with the top of the ruler against the top of the strip and the proper finished size line against the bottom of the strip.
 |
| 8 - Right Handed |
 |
| 8 - Left Handed |
9.
Trim along the slanted edge of the ruler as shown.
 |
| 9a - Right Handed |
 |
| 9b- Left Handed |
10.
To make the next cut, keep the fabric in the same position on the mat and rotate the ruler 180° as shown below. Position the extended diagonal line against the previously trimmed slanted cut. The bottom ruler edge will be against the strip edge and trim as shown below.
 |
| 10a - Right Handed |
 |
| 10b - Right Handed |
 |
| 10a - Left Handed |
 |
| 10b- Left Handed |
11.
Each cut will give you a mirror image pair of Side Triangles that will be sewn to both sides of the center triangle. Repeat until you have all the required pairs of Side Triangles.
 |
| 11 - Right Handed - After the first 2 cut you go back to the first position and repeat |
 |
11 - Left Handed - After the first 2 cut you go back to the first position and repeat
|
12.
Layout the V Block™ units. Make sure that you are lining up the long edge of the Side Triangles with the edges of the center triangle.
 |
| Long Sides together - It will create a Square |
13.
Start sewing the left Side Triangle on first. Flip the center triangle onto top of the left Side Triangle, simply position pieces’ right sides together, lining up the slanted cut edges “tip to tip”. Stitch with the center triangle on top. Placing the center on top, while you sew will ensure you are sewing your best ¼” inch seam on the center unit. Press towards the Side Triangle.
 |
| Center on top to ensure your best 1/4" seam |
 |
| I chain stitch them |
 |
| Set in your seam to lock in that seam and to ensure flat seams |
I used a
Magic Press Mat and
Quilter's Fine Mist Spray bottle loaded with Best Press during my pressing process to help be get the best seams! Both are available in my
Etsy shop.
 |
| Finger Press ~ then Press with an Iron |
14.
Now stitch on the right Side Triangle. Lay out the Left/Center Triangle Unit with the right Side Triangle. Making sure you have it set up properly (to form a square). Flip the Left/Center Triangle unit onto the right Side Triangle, right sides together. Stitch with the Center Triangle on top and sew your best ¼” Seam.
 |
| Lay out the units again to make sure you have the proper orientation - SEE IT |
 |
| FLIP IT - SEW IT - Center on top |
 |
| Set in your seam |
 |
| Finger Press - Press with the Iron |
 |
| Tada - Perfect units that are slightly oversized |
15.
To trim the sewn units, position them on a cutting mat as shown in the photo, aligning the proper “Finished Size” measurement with both of the seam lines, ensuring the “V” lines up. Trim along both edges.
 |
| 15a - Right Handed |
 |
| 15b - Right Handed |
 |
| 15a - Left Handed |
 |
| 15b - Left Handed |
16.
Rotate fabric unit 180° and reposition ruler on top. Align with the proper “Cut Size” measurements with previously trimmed corner and “X” with the sewn seam intersection. See illustration. Trim along both sides. Remember, the Cut Size of your unit will be 1/2” Larger than the Finished Size.
 |
| 16a - Right Handed |
 |
| 16b - Right Handed |
 |
| 17a - Left Handed |
 |
| 17b - Left Handed |
17.
Repeat for all the required Units. Label and place in a safe place.
 |
| Tada! Love it! |
18.
Also, label your cut BG Rectangles and place them in a safe place, you will have to w
ait for another clue to find out what you do with those!
19.
You are ready for the next clue!
I hope this pictorial and the directions in the
Download made this unit very easy for you to complete. I'd love to hear your thoughts. Feel free to share comments here or in the
SOTS Facebook group.
Just a reminder on the
SOTS Facebook group, I screen applicants, therefore you have to answer the questions to be admitted. You also have to be a subscriber of my email newsletter (you can sign up here:
Sign Up for Newsletter.
Speaking of Facebook, many of you probably read in my newsletter, that I'm trying to make a pledge to sew one hour daily (yes, even though my business is quilting, there is a lot of other tasks involved, so I need to make the plead too). I'm trying to post my progress whenever I can, I can't always due to circumstances like the mystery, upcoming patterns, etc... However, if it isn't "top secret" I will try to post.
I'm hoping many of you will join me by tagging your photos on Instagram and Facebook with
#sewonehourdaily. Make sure to follow the hashtag and you can follow me on Facebook at:
Sew On the Go Facebook Page and on Instagram at:
@mshellhiatt. Let's inspire each other this year!
I hope you all have a great day and weekend. It is going to be cold here in the northeast, great sewing weather! I have to get ready for my Cabin Fever retreat next weekend!
By the way, if you are looking for a great winter retreat, to get out and socialize with some great quilters and to learn something new, consider my Q
uilter's Choice Retreat at the Strong House Inn, in Vergennes, VT. February 7th-10th. It is small retreat where you can bring a UFO from any Studio 180 project or pick one of my patterns to learn. Details can be found here:
Michelle's Retreats.
Keep Stitching,
Michelle


Comments
Post a Comment