Yeah! The kick-off of my Sunset on the Sound Mystery is here! Thank you to everyone who plans on participating. I promise this will be great fun and manageable.
First off,
THANK YOU, to all of those who joined me for my 2018 Timeless with a Twist journey. I appreciate all the notes you sent or posted last week! I love hearing from you and I especially love seeing your progress photos. Please keep them coming!
Okay, for our next journey, I want to get some Sunset on the Sound house-keeping out of the way:
The most important thing you can do is read my newsletter and especially the blog post each week. I will provide pictorials of each of the week's clue plus the download with details. The biggest thank you, you can give me, is to
read the information I take the time to prepare, so that you are successful. While I love hearing from each of you, it is tough to handle 30+ emails each week that are asking information that was already provided, in great detail, here on the blog. I know everyone learns differently, so I take time to provide written words, graphics and photos. This takes a tremendous amount of time.
So, please read! 🙂
Next, for those that are new to my weekly challenges, here is an overview of how I set it up:
- You will need to subscribe and read my newsletter to receive details and notification of that the clue is ready.
- Links in the newsletter will lead you to the blog post, which will have extremely helpful tips, photo, and basic instruction that will help you be successful.
- Within the blog post, there will be a Download link, that will take you to my website. From there you scroll to the Sunset on the Sound Section and click on the download.
- You can then print or save the pdf to your computer or tablet. The downloads or print out are not to be shared, they are for your personal use and can not be distributed without my approval.
- Clues will remain on my website for only 3-4 weeks, they will not be kept on the website throughout the series. This is a limited access series, the clues will not be available once they are taken down.
- You can join the Sunset on the Sound Facebook group (you must answer the questions to get approved): SOTS Facebook group. This is not required, but great fun!
- If you need details on Fabric Requirements or understand how the series will work, you can catch-up on those details in my early blog post: Join Me for my Mystery Blog Post.
Over the 17 weeks and 16 clues, you will receive manageable clues. They clues should only take you a few hours each week.
Estimate:
- Wall/Baby - 1 1/2 - 2 hours a week
- Throw - 3 - 3 1/2 hours a week
- Queen - 4 - 5 hours a week
Okay, now onto the fun stuff!
Clue #1 - We will be using our
Accent and Background Fabric to make Corner Beams! You will need the
Corner Beam ruler for this week's clue. If you do not have one, you can
purchase it in my Etsy shop.
Please see the
download for specific cutting instructions, but
let me walk you through the process and provide a few extra tips that I share in the classroom (Make sure you check out my teaching/event schedules by following my events on Facebook-
Michelle's FB Event Page for the true interactive experience).
1.
Gather your Accent (AC) and Background (BG) fabric and follow the directions in the
Download to cut your squares and strips.
2.
Take your Accent (AC) squares, to cut the Center Beam; layer fabric no more than two layers deep. Align the Center Beam Trim #1 line on your Corner Beam tool and the proper finished unit size line with the raw edge of your stack of squares. Trim.
 |
| 2a-Right Handed |
 |
| 2b-Right Handed |
 |
| 2a-Left Handed |
 |
| 2b-Left Handed |
3. Lift and reposition the Corner Beam tool, aligning the dashed line labeled Center Beam Trim #2 with the previously trimmed angled edge and take the time to align the corner tip. Trim again. Repeat for all Accent (AC) squares.
 |
| 3a-Right Handed - Take the time to line up the tip and I follow the proper proper finish size unit line out and make sure it lines up with the edge of my square. This gives me 3 points of reference. |
 |
| 3b-Right Handed |
 |
| 3a-Left Handed -Take the time to line up the tip and I follow the proper proper finish size unit line out and make sure it lines up with the edge of my square. This gives me 3 points of reference. |
 |
| 3b-Left Handed |
4. Gather the Background Side Triangle strips. Fold each of the strips in half, placing wrong sides together on the cutting mat and clean up raw edges.
5. Position the Side Triangles Trim #1 line on your strips, lining up the proper finished size unit line on the tool with the bottom raw edge of the strip. Trim.
 |
| 5a-Right Handed |
 |
| 5b-Right Handed |
 |
| 5a-Left Handed |
 |
| 5b-Left Handed |
6. Rotate and trim again. Rotate the Corner Beam tool and position the Side Triangle Trim #2 line on the edge of the strip you just trimmed, making sure the bottom of your strip is lined up along the second trim line. Trim. Repeat until you have all of your required pairs of Side Triangles.
 |
| 6a-Right Handed |
 |
| 6b-Right Handed |
 |
| 6a-Left Handed |
 |
| 6b-Left Handed |
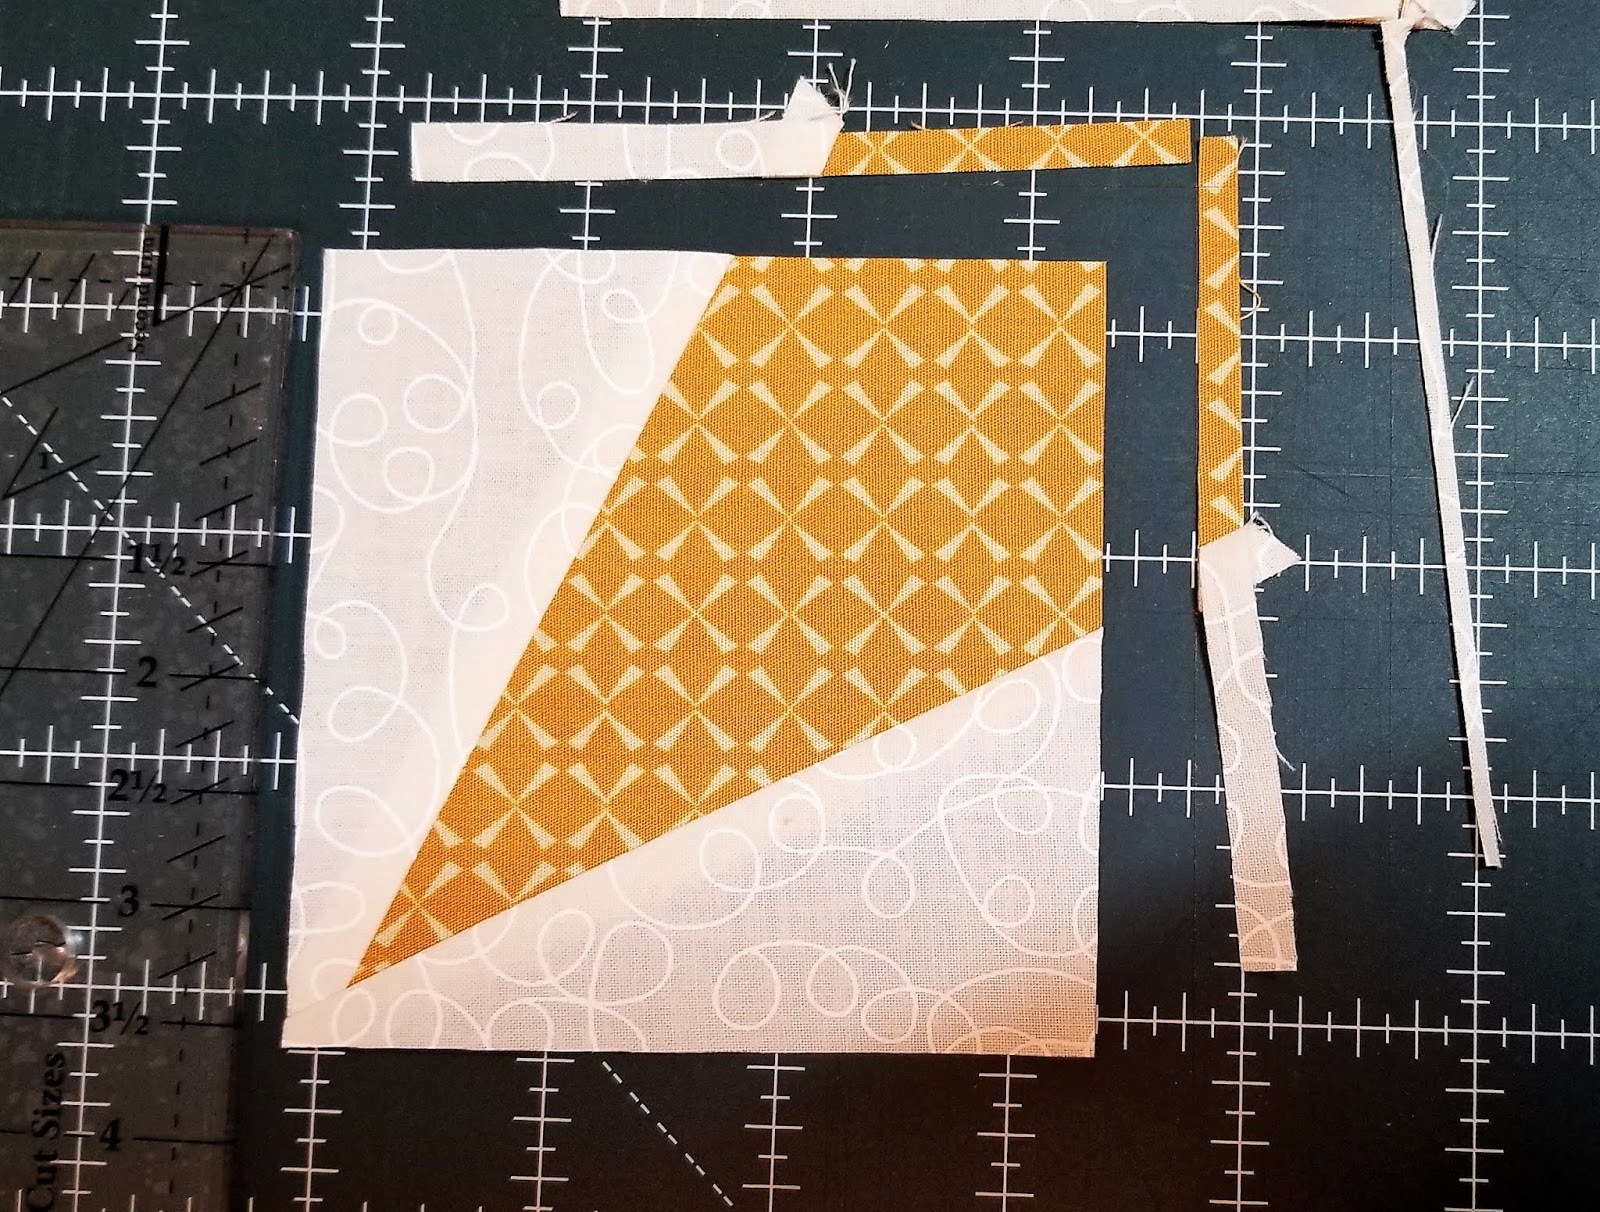
7.
Lay out and organize your pieces in the correct position, as shown, to ensure you sew the proper sides together.
 |
| You should be creating a square when you lay out the components - SAVE the cut-offs |
8. Stitch the first Side Triangle to each Center Beam, making sure you sew the correct triangle edge to the Center Beam. Shift the pieces slightly as shown in the diagram to make sure you have a little bit of fabric on all sides. To do this, offset the tip of the Center Beam about 1/4” above the Side Triangle. This may take practice; therefore, you may want to make and trim a complete unit first.
 |
| I use my Quilter's Magic Wand to check my offset |
9. Stitch with the Center Beam on top. Placing the center on top, while you sew will ensure you are sewing your best ¼” seam on the center unit which you have precision cut. Press towards the Side Triangle.
 |
| Stitch with the Center Beam on top |
 |
| Set in your Seam - This means to heat the seam prior to finger pressing. Heating the seam will lock in that seam and also make it much flatter |
 |
| Finger press and press - The last thing you want to do use a high iron to force your fabric to flip back. Take you fingers, flip the fabric back and gently run your finger on the seam to finger press. Then, lay your iron on the seam. |
I used a
Magic Press Mat and
Quilter's Fine Mist Spray bottle loaded with Best Press during my pressing process to help be get the best seams! Both are available in my
Etsy shop.
 |
| Good pressing techniques will help create beautiful flat seams |
 |
| Lay the unit back out to ensure you have the proper orientation |
10. Now stitch on the second Side Triangle. Stitch with the Center Beam on top and sew your best ¼” seam. Press towards the Side Triangle.
 |
| Check the offset |
 |
| Stitch with the Center Beam on top |
 |
| Set your seams |
 |
| Finger press and press |
 |
| Flat Seams |
 |
| Success! Slightly oversized units that will now be trimmed down |
11. To trim the sewn units, position the trim down area of your Corner Beam tool on your unit. Carefully line up the diagonal seam guidelines on the Corner Beam tool with the diagonal seams of your unit, and trim.
12. Rotate your unit. Align the cleanup lines for the proper cut size with the cut edge and the V shaped guideline with the seam intersection. Trim.
 |
| 12a-Right Handed |
 |
| 12b-Right Handed |
 |
| 12a-Left Handed |
 |
| 12b-Left Handed |
13.
Repeat for all the required Units. Label and place in a safe place. You are ready for the next clue!
 |
| Perfect units! |
 |
| Tada! |
Well that is it for this week. I hope you will share your photos in comments on this blog or on the
SOTS Facebook group. Stay tuned for next week's clue on Friday, January 11th.
Have a great weekend!


Yeah, time to start
ReplyDeleteI finally have my fabrics gathered and started reading instructions. I noticed that you frequently mention pressing with a fine mist of Best Press. When do you add the spray? Before setting the seam? At the very end when everything is in place to make it nice and crisp?
ReplyDelete