Holiday Solstice - Clue 6 - Bites the Nose!
Sorry for the delay. We are still dealing with a family emergency and I'm on the mend. Better late than never. I promise you this Holiday Solstice Block will be worth it.
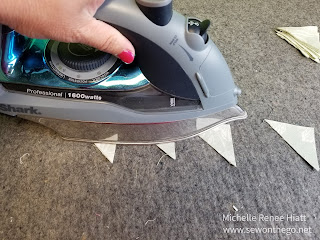
Now to trim
Bites the Nose is made up of Non-Mirror Image Combination Units, Four-Patches, and a pair of Mirror Image Split Rects. These blocks are only 6" Finished (6 1/2" cut), therefore these are some pretty small units. Please read my tips below! :)
This block is going to be a bit of a challenge, but you can do it. I want you to take it step-by-step.
- Please read my tips below.
- Please read the Clue end to end first.
- You will want to take your time and most importantly check your 1/4", you will need a perfect quarter inch.
- Take your time, it is not a race.
- For those of you new to me this series, there is only one new technique here, so deep breathe, you are going to be okay.
- For those of you that have been following me, just remember all the tips and skills we've built and you will be fine.
- The new technique is the Non-Mirror Image Combination Units. This is fabulous, I used it in my Sparkle quilt. I've given you everything you need for this size unit in the Download, but if you want to use this technique for other sizes, there is a great technique sheet- Non-Mirror Image Combo Units.
- Some of you have been struggling with the Split Rects; (1) You need the Split Rects Tool, you can't make it properly without it. (2) You must pay attention to the right side up or right side down directions when cutting. (3) Pay close attention to the lines on the tool and your seam, you need to line them up before trimming.
- Due to the size of these units, I used the Four-Patch Square-Up this week. It helped my tiny four patches be perfect. I should the trim down below. It is not required, but it did make it really easy.
Okay, do let's get started on some detailed tips.
Fabric Selections
I highly recommend laying out your fabric, similar to how I have then below, to determine if your fabric selections will work, before your cut them. You will notice that I fold my fabric to be similar shapes that are found in the block, and sort of put them in relation to each other. It helps me and I think it will help you too.
 |
| Fig Christmas II fabric selection Given that my fabric selections is red, green or ivory, I elected different small and medium prints, mixed with solids to give the block that added interest. |
 |
| Sun Prints 2020 fabric selections |
 |
| You will note, that I've elected (3) sets of Complementary Color pairs for this block |
I really want the block to pop, so the Complementary Color pairs will make this work for my block.
Non-Mirror Image Combination Units - This week's new technique
 |
| Mark 2 lines with your magic one, diagonally from one corner to the other |
 |
| I use the Sewline Pencils, because it is a thin chalk line that will not remain in my quilt, yet allows me to get in there nice and tight to draw my line. |
 |
| Next mark the other direction |
 |
| You will have a double X on your block with a square in the center. |
 |
| Place them right side together with your Medium |
 |
| Put on a foot, that allows you to see your needle hit the fabric. I use my Star foot on my Pfaff. An open applique foot would work too. |
 |
| You will start on the line to the right. |
 |
| Stitch down to you are halfway through the center square. |
 |
| Pivot and sew across the middle of the square. |
 |
| And sew down the left hand side. |
 |
| You basically have a backwards S. |
 |
| Turn your unit 90 degrees and repeat. Start on the right side, stitch down to the middle of the square. |
 |
| Pivot and stitch across the center of the square to the other side. |
 |
| Pivot and finish sewing the left side. NOTE: NOT ALL LINES WILL BE SEWN - That is how it should be. |
 |
| You will have 2 backward S. |
 |
| It might be a little easier to see on my dark units. |
 |
| Check to make sure you have 4 pouches. |
 |
| Give them a good press before cutting. |
 |
| Cut in half vertically. |
 |
| Cut in half horizontally. |
 |
| Perfect BE VERY CAREFUL handling these as you have exposed bias. It is very easy to distorted these units. |
 |
| Next set your seam |
 |
| VERY IMPORTANT - Finger press - DO NOT USE THE HOT IRON TO PUSH this fabric. |
 |
| Then press. |
 |
| Tada! |
 |
| Next pair them with the Dark HST which will be larger - it is okay. |
 |
| Stitch a good 1/4" seam, allowing your machine to stitch these - DO NO PULL - You will stretch these. |
 |
| Set your seam. |
 |
| Finger press. |
 |
| Press. |
Right Handed
Left Handed
Constructing your Block
Tada!
I adorn this block and hope you do too!
 |
| Put the piece corner in your upper right, and line up your Tucker Trimmer with the proper cut size and the common diagonally between the pieced corner. |
 |
| Rotate your unit and line up the just cut edge with the proper cut size and your line should fall back into place. |
 |
| Tada |
 |
| Put the piece corner in your upper left, and line up your Tucker Trimmer with the proper cut size and the common diagonally between the pieced corner. |
 |
 |
| Rotate your unit and line up the just cut edge with the proper cut size and your line should fall back into place. |
 |
| Tada |
 |
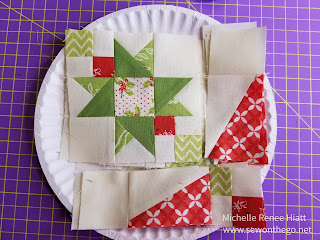
| Start with the star block and put that together first. Pay very close attention to your orientation. Check that 1/4" seam - I can not stress that enough. |
 |
| Sew into rows and then blocks, double checking that orientation. |
 |
| Please, pay attention to the instructions for the Split Rects. It is very easy to get these mixed up. |
 |
| Lay out your block, triple check your orientation |
 |
| Stitch them together with your best 1/4" seam |
Tada!
 |
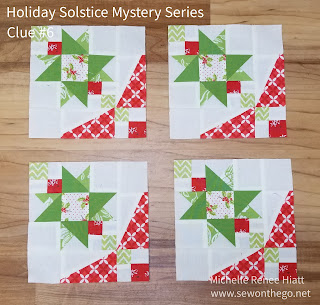
| Block 6 - Bites the Nose- Christmas Fig II Version |
 |
| Bella got in on the action! |
 |
| Block 6- Bites the Nose - Sun Prints 2020 version |


I love this block!!!!! Going to make some 12" blocks in different fabrics for baby quilt. I think putting 4 together with cornerstone and sashing, and the split rec framing each set of 4 will work.
ReplyDeleteThank you for the detailed description of the combination unit. Going to practice that on scrap fabric first.
ReplyDeleteThis comment has been removed by a blog administrator.
ReplyDelete