Time to kick off Holiday Solstice!
It is time to kick off my annual Holiday Medallion Mystery Series! This year's mystery is Holiday Solstice.
Are you ready to get started?
Today I'm revealing Clue #1 - Block 1 - Ting-A-Ling-Ling. It is actually a Square Cubed (Square-in-a-Square-in-a-Square), however I given it a fun name for this series. You will be using the Square Squared for this Clue.
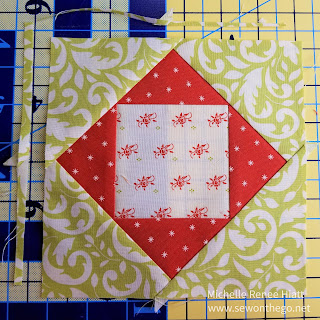
Here are both my versions. Below I'm going to talk you through why I selected the fabric I did, to help you pick the ones for your quilt.
 |
| Block #1 - Ting-A-Ling-Ling - Christmas Fig II |

Before we get started. I wanted to remind you to check out my Tutorial Tuesday-Week 10 that was published last Tuesday. It was the first of two Tutorials on Quilt Backings. I've received tons of great feedback. Please feel free to watch on Facebook or through YouTube. If you find it useful, please feel free to share with your Quilting Friends.
View on Facebook:Facebook Video
View on YouTube: TT-Week 10
If you love these videos, please "follow" my Facebook or YouTube Channel.
Some Housekeeping items
For those of you new to my series, make sure you have:
- Subscribed to my newsletter.
- You can do it at: https://sewonthego.net/newsletters
- Make sure to complete all the fields and hit submit.
- Added my email address to your "email contacts"
- My email is michelle.hiatt@sewonthego.net
- Note a few things:
- The pictorial on this blog, will stay up, there is no need to print it unless you want to have it in paper form.
- The cutting and step-by-step directions are in the download, which you can get by looking for the word "download" below. Once you get to my Retreat page, scroll down to the bottom of the page and you will see the PDF download.
- The downloads are only available from Friday mid-afternoon to the following Thursday night at mid-night. No exceptions.
- I understand things happen and you may miss a clue. Therefore, I make them available for a few weeks after, for $3 a download. I think this is more fair.
For those of you who have participated in prior series or are new, there are a few items of note:
- Very important - You will need a code to open the download.
- The code is in your newsletter.
- You will need this week's code each time you open the Clue.
- The codes can not be shared, you have to use your own code.
- Next week, you will be assigned a new code, for the next Clue, and so on.
- TIP: If you usually run behind, write down your weekly codes, someplace where you will remember to look them up. Reference them when you are ready to make the Clue. Or just print them off the day you download them.
It is a shame it has to come to this. However, I found my clues, the entire series, of two prior mystery series, on three different Guild's website. Open for their members and everyone else to download and share. Apparently, the people who posted and shared them need to understand that is a violation of the Copyright. The Clues are for your use only. It is very disappointing and I was very close to cancelling this series.
I know most of you know and understand, there is a lot of work that goes into these mysteries. Over two hundred hours just to design and write the series. Plus, countless hours in testing my design and having secret testers review. 8-10 hours weekly documenting and writing the blog. I do this for my followers, who are going to play along each week; reading my newsletter, reading my blog, and downloading the Clues weekly, and hopefully making the blocks. I understand many of you may run behind and this is total fine. I understand things happen and you miss a clue, which is why I make them available for a few weeks after their release, for $3 a download. I think this is more fair.
Most of you patronize my online shop for things that you need and I carry, you purchase my patterns, you come to my classes or events when possible. I truly appreciate it. However, there are a few, it seems, that don't respect the work, and therefore I had to password protect the downloads.
I already know, today is going to be a big email day. I just hope you read the newsletter and blog, think about what I've said, before you send me an angry email or IM. I know this isn't ideal, but it is only a four digit code that has been assigned to you, for you to open the pdf. I think it is fair and hopefully will protect the clues from being shared. If they are and I find them, I will know who shared them.
Okay, back to the positive, after all we are kicking off a fabulous new mystery that I guarantee you are going to love.
I have one more favorite. Please read the Blog. There are a ton of great tips and advice, for free. This blog is here to help you. Please read.
NEW OPTION - If you would like to subscribe to the No Hassle Subscription to the Holiday Solstice Mystery Series for $18 (2 payments of $9) and get the Clues emailed to you each week. Click HERE: Subscribe to No-Hassle
- After the weekly newsletter is released, you will received an personal email notifying you of this week's clue.
- You will be able to download the Clue directly, without a code.
- You will be charged $9 at enrollment and $9 a week later.
- You will have access for any prior released Clues as soon as your payment has been processed.
- All future Clues will become available as they are released.
- You will have access to the Clues until 12/1/2020
- Downloads will be limited to 3 per Clue
- Downloads will be marked with your email address.
- These Clues are not to be shared, they are for your use only.
Let's talk fabric selection for Block 1:
For today's Clue, you are going to make one feature Block and four more. You can decided to make them all the same, or one slightly differently. Here is your first bonus tip... the feature Ting-a-Ling-Ling Block is going to be the center of your quilt. :)
For my Moda Christmas Fig II selection, it was easy. I elected to change the Center and keep my other fabrics the same.
- The Center, of all the Blocks, is a great place to use one of those fabrics that is close to your background.
- The 1st round of Triangles will work best with a dark*
- The 2nd round of Triangles is another great place to put a fabric that may have a lot of your Background color mixed in with it, or a larger print.
*If you went with a dark background, you may find yourself using light where dark is called for and vice versa. This is because your background is dark, where as my original design is using a light. Therefore, it may make sense for you to switch.
 |
| My Feature Center is on the left |
Now for my alternate selection, Alison Glass' Sun Print 2020, I had some planning to do. The Sun Prints are all pretty much Medium, Medium-Dark, or Dark. Therefore, I'm going to have to use my colors to make it pop.
As I shared last week. I've partner each of my fabric, with it's Split Complementary partner. For the most part, I will be using that plan through out the pattern. Which will allow the units and blocks to pop off of one another. For more on separating your fabric, see last week's post: May 29 Post.
- Similar to the main selections, I opted to only change the center on my Feature Block.
- I went with a Orange Red (20) and Aqua Blue (8) for 1st and 2nd round of Triangles. Directly across the color wheel, 12 tabs apart.
- I then elected to pick an "accent" for both block types. For one I went to the mid-point on the right (Chartreuse 2) and the other the mid-point on the left (Red-Violet 14).
- I liked the Green better, and therefore elected to do 4 with that one, but I think the Red-Violet will provide a nice balance, given how dark it is, with my Dark Charcoal Background that I've selected. I know, craziness happens in my head. LOL.

Let's talk about cutting and staying organized:
For those of you who have done these "block" mysteries of mine, you know I tell you each time, don't make Swiss cheese out of your Fat Quarters. You will waste a lot of Fabric
- When approaching your cutting, determine your fabrics, and then find the largest cut required for that fabric, and cut the full FQ strip.
- Then make your sub-cuts.

- Put your required piece(s) on your plates (you can find out more about how I mark my paper plates in Tutorial Tuesday-Week 2-Part 1 Video.
- Put the remainder of yo Fat Quarter in a Partial FQ baggy.
- Put the remainder of your Strips, greater than 10 inches, in a Partial Strips baggy

- Put the remainder of your Strips, less than 10 inches, in a Scrap baggy.

- In future blocks, you can refer to these baggies and use these pieces, if they are the same size or slightly small, prior to cutting more strips.
Get your tools and machine ready
I highly recommend that you put Invisigrip on the back of your ruler.
- It will keep your ruler from slipping.
- It will protect the fine lines on your ruler.
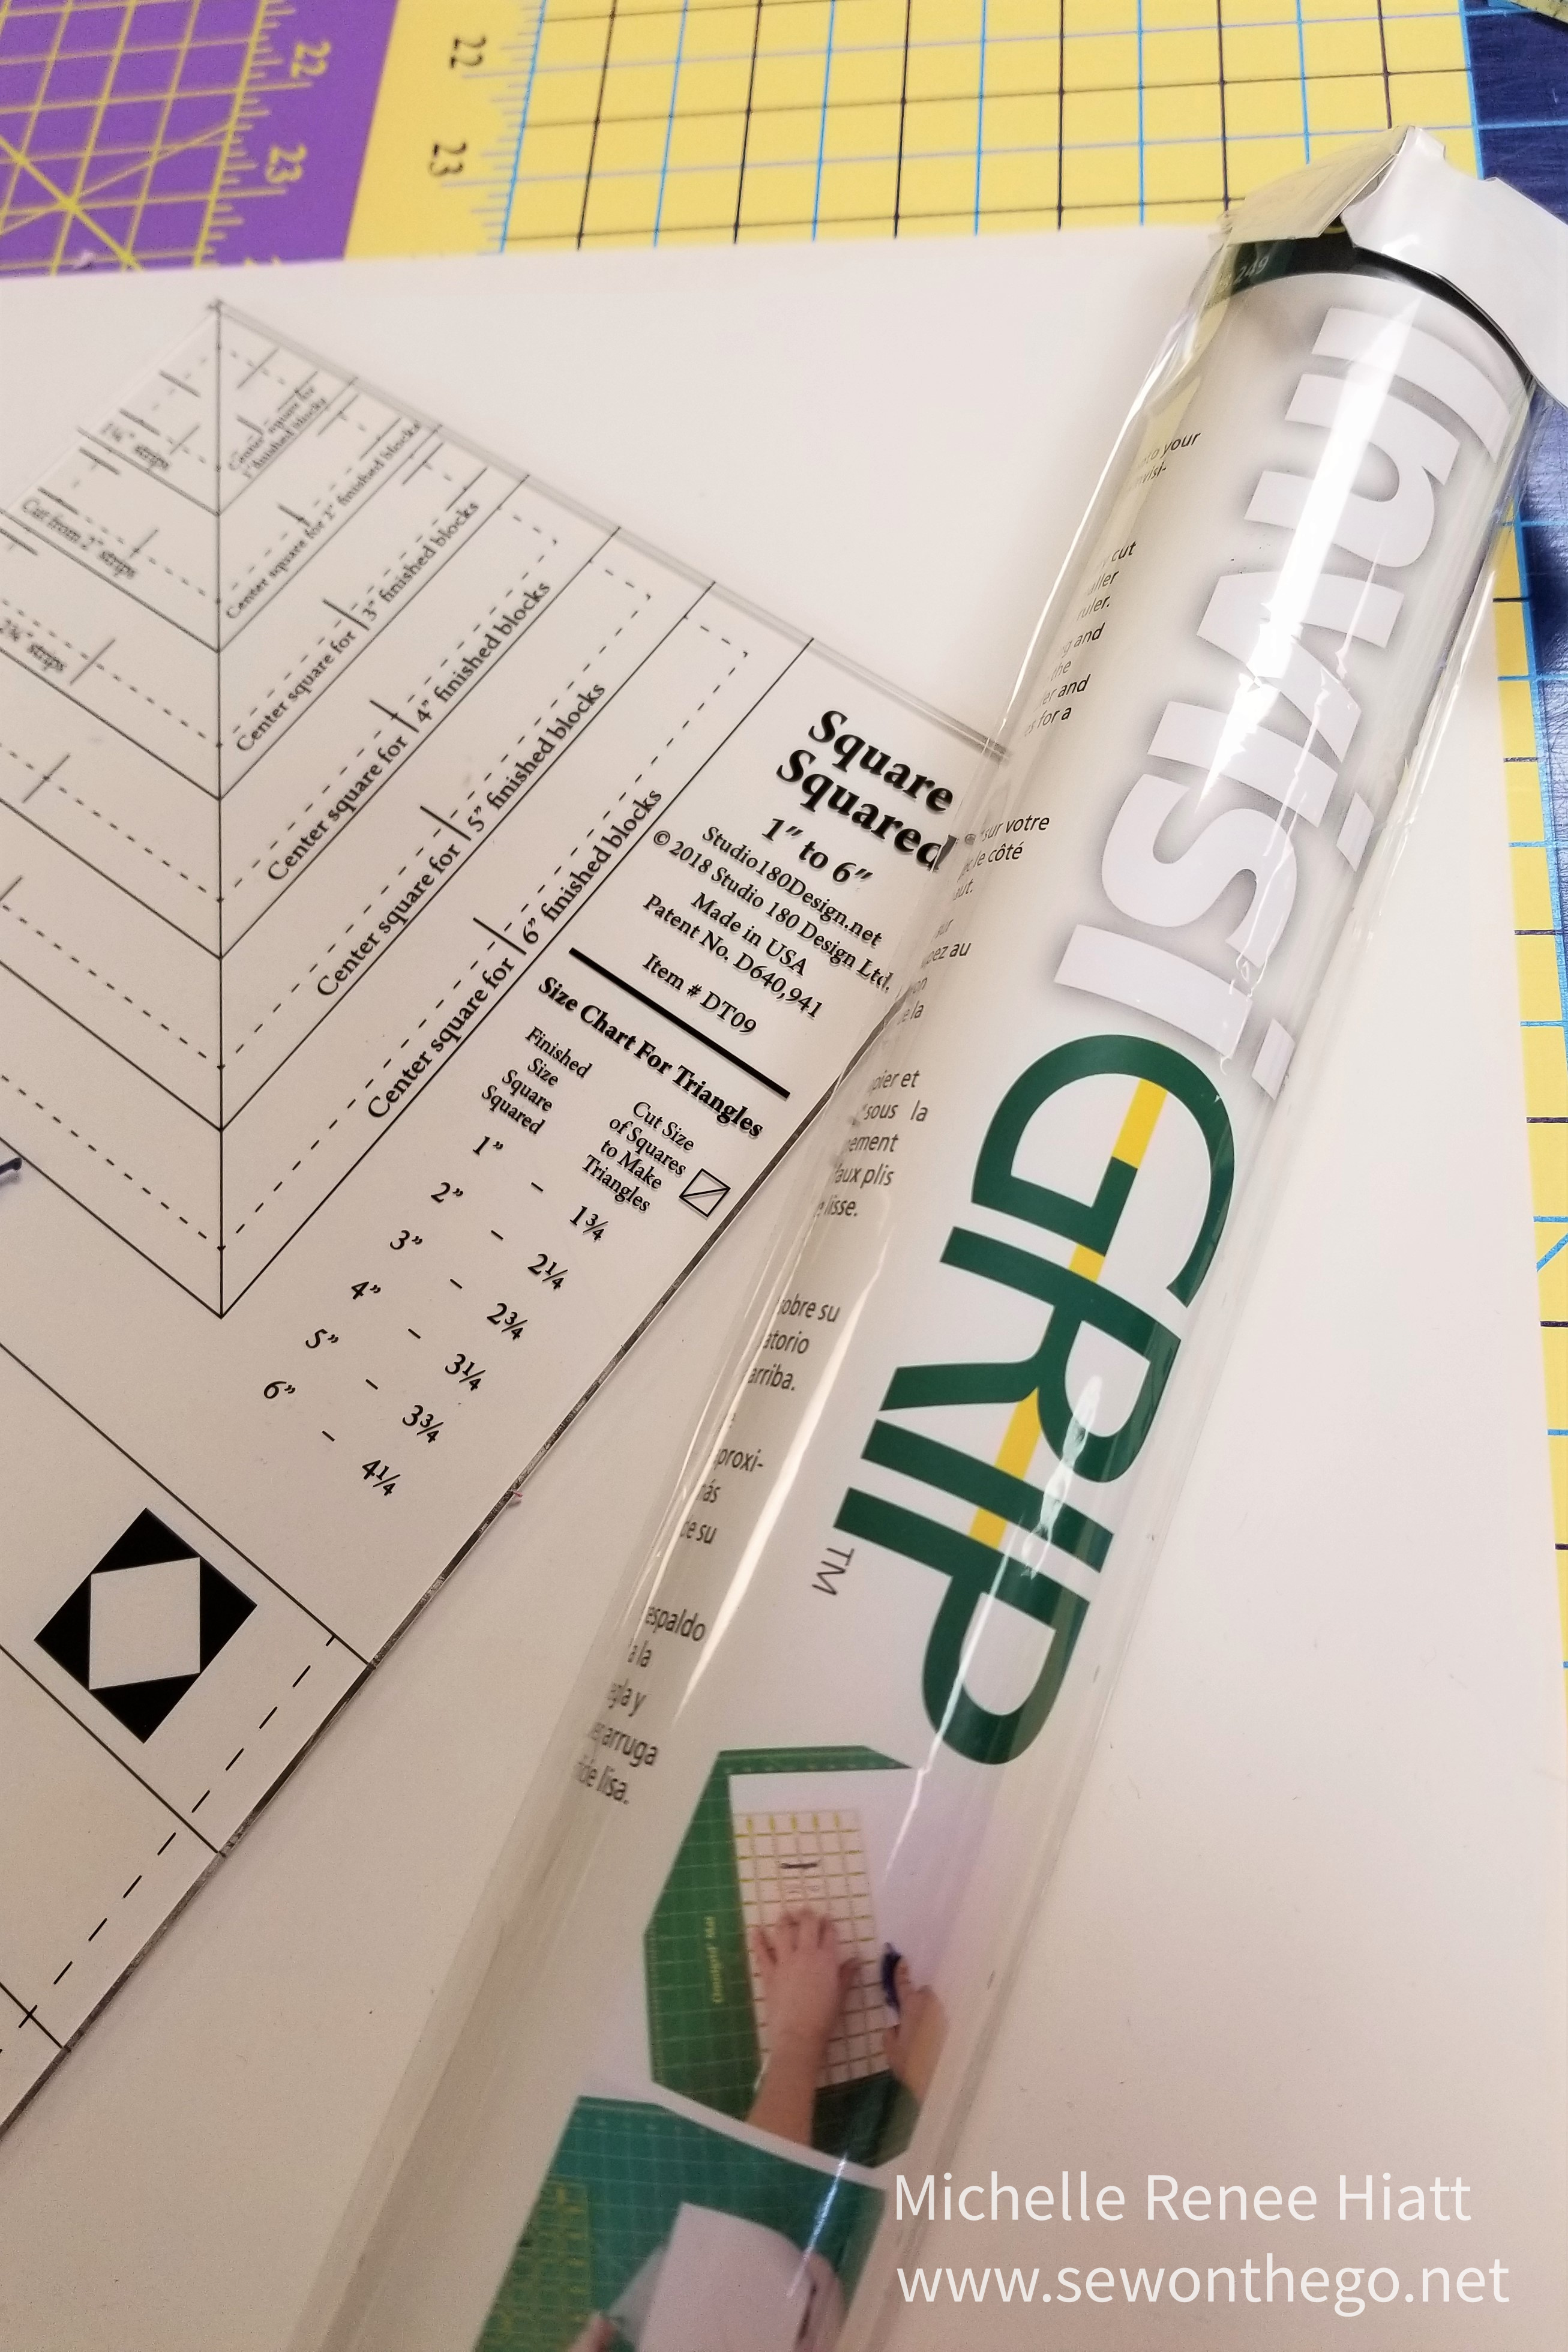
It is very easy to apply, you cut it 1/4 shorter than the ruler in both directions.

The part that comes off the white paper, goes onto the bottom of your ruler. If it has bubbles, just lift that corner and smooth it down again.

Now, give you machine a good cleaning, change the needle, check your 1/4 inch seam allowance. Test it, and make sure it is accurate. Move the needled if need be. Also, reduce your stitch length to 1.8-2.0 depending on your machine.

Get organized
When making a Square-in-a Square, I like to stack my plate with all the pieces prior to getting start... then I just sew my way down through the stacks on the plate, picking the right pieces.
- I put my Round 2 Triangles on the Bottom, splitting them half and half on each side.
- Then I put Round 1 Triangles on top of those.
- Then the Centers on top.


We are ready for Block 1 - Ting-a-Ling-Ling!
Remember, I'm providing you with tips below, you will need to download the clue for the step-by-step instructions. Remember to get your code from your newsletter and use it to open the Clue.
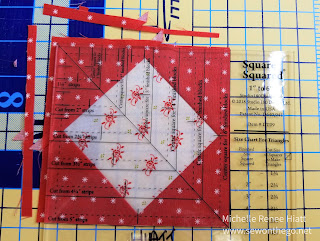
Tips and Guidance:
You will want to set up your unit, so you can "see it".

"Flip it"


Next, you will set the seam.


Take the time to locate the halfway registration marks and the dashed ¼” line and line them up with the sewn seam intersections for the size listed.

This is very important, and could take a bit of fussy, your first few time.
Right Handed:


Line up with the registration marks and the dashed ¼” line and line them up with the sewn seam intersections as well as the cut size line.
 Trim the two sides.
 Rotate the unit and line up with the registration marks and the dashed ¼” line and line them up with the sewn seam intersections as well as the cut size line.
 Next, lay them back down on your paper plate with your Round 2 Side Triangles.
 You will sew this second set on the same as you did the first set, however now you must pay attention to the seam intersection of the first set of triangles. Ideally, you should sew directly over that intersection or 1 thread to the right. You do not want to drop that point.
 Press it and lay back down and put the next triangle on
 Trim the dog ears and lay back down.
 Stitch the last two Side Triangles on.
 Once you have all four side of the 2nd round of Side Triangles on, take your Mister with Best Press (or another agent) and make sure these units are flat before trimming.

 Cutting up the side and across the top.
 Rotate the unit, reposition tool to align with the proper cut size lines and the proper Xs.
 Then, trim the remaining two sides.
 Left Handed:


Trim the remaining two sides.


Right Handed
Now you are going to line up the unit with the opposite side of the Square Squared tool over fabric aligning the proper Xs with latest seam intersections to trim first corner. Cutting up the side and across the top.


Now you are going to line up the unit with the opposite side of the Square Squared tool over fabric aligning the proper Xs with latest seam intersections to trim first corner. Cutting up the side and across the top.
 Cutting up the side and across the top.
 Rotate the unit, reposition tool to align with the proper cut size lines and the proper Xs.
 Then, trim the remaining two sides.


Tada! You have complete Clue #1! Make sure to share your completed blocks with the Holiday Solstice Facebook Group.


That is it for this week. I hope you have read everything and are understanding. This is going to be a great series and I can't wait for you to see the final Quilt!
Take care and stay safe.
Keep stitching,
Michelle


Comments
Post a Comment