Block 21 - Peony and Forget Me Nots
Whew! What a few days. I'm getting ready for probably the busiest 7 weeks of the year. So, apologies, I'm a little late today.
This week's block is fabulous. It is Peony and Forget Me Nots, published by Nancy Cabot in the Chicago Tribune, November 19, 1936. This block is very striking with its non-mirror combination units, stepping patches, and popped rectangles.
I’ve never seen this block, however I found a block that was similar, published as Double Astor. It was also credited to Nancy Cabot, just a week before on November 12, 1936. However, it was missing the 12 patches stepping through the corners, which I think makes this block. Maybe it was part of a building technique series. One can hope!
Speaking of techniques, this week I have 2 new techniques for you. We are going to make Non-Mirror Combo Units with our Tucker Trimmer! Then, we are going to make Popped Rectangles using a "new to the series" Studio 180 Corner Pop! I will provide you with the instructions that you need for this week's block, but know that there is a fabulous tech sheet to help you make when making other Non-Mirror Combo Units.
Lets get started! Remember measurements are in this week's download, which is only available through Thursday, June 21st.
Non-Mirror Combo Units:
1. Gather the Background Squares and the Medium squares
2. Layer. Place the Medium square right sides together with the background square and align the raw edges. Press them together with a bit of steam to help hold them in place. With the Medium on top, mark four diagonal lines that are ¼” on either side of the true diagonals. Highly recommend using the Quilter’s Magic Wand™ for this task.

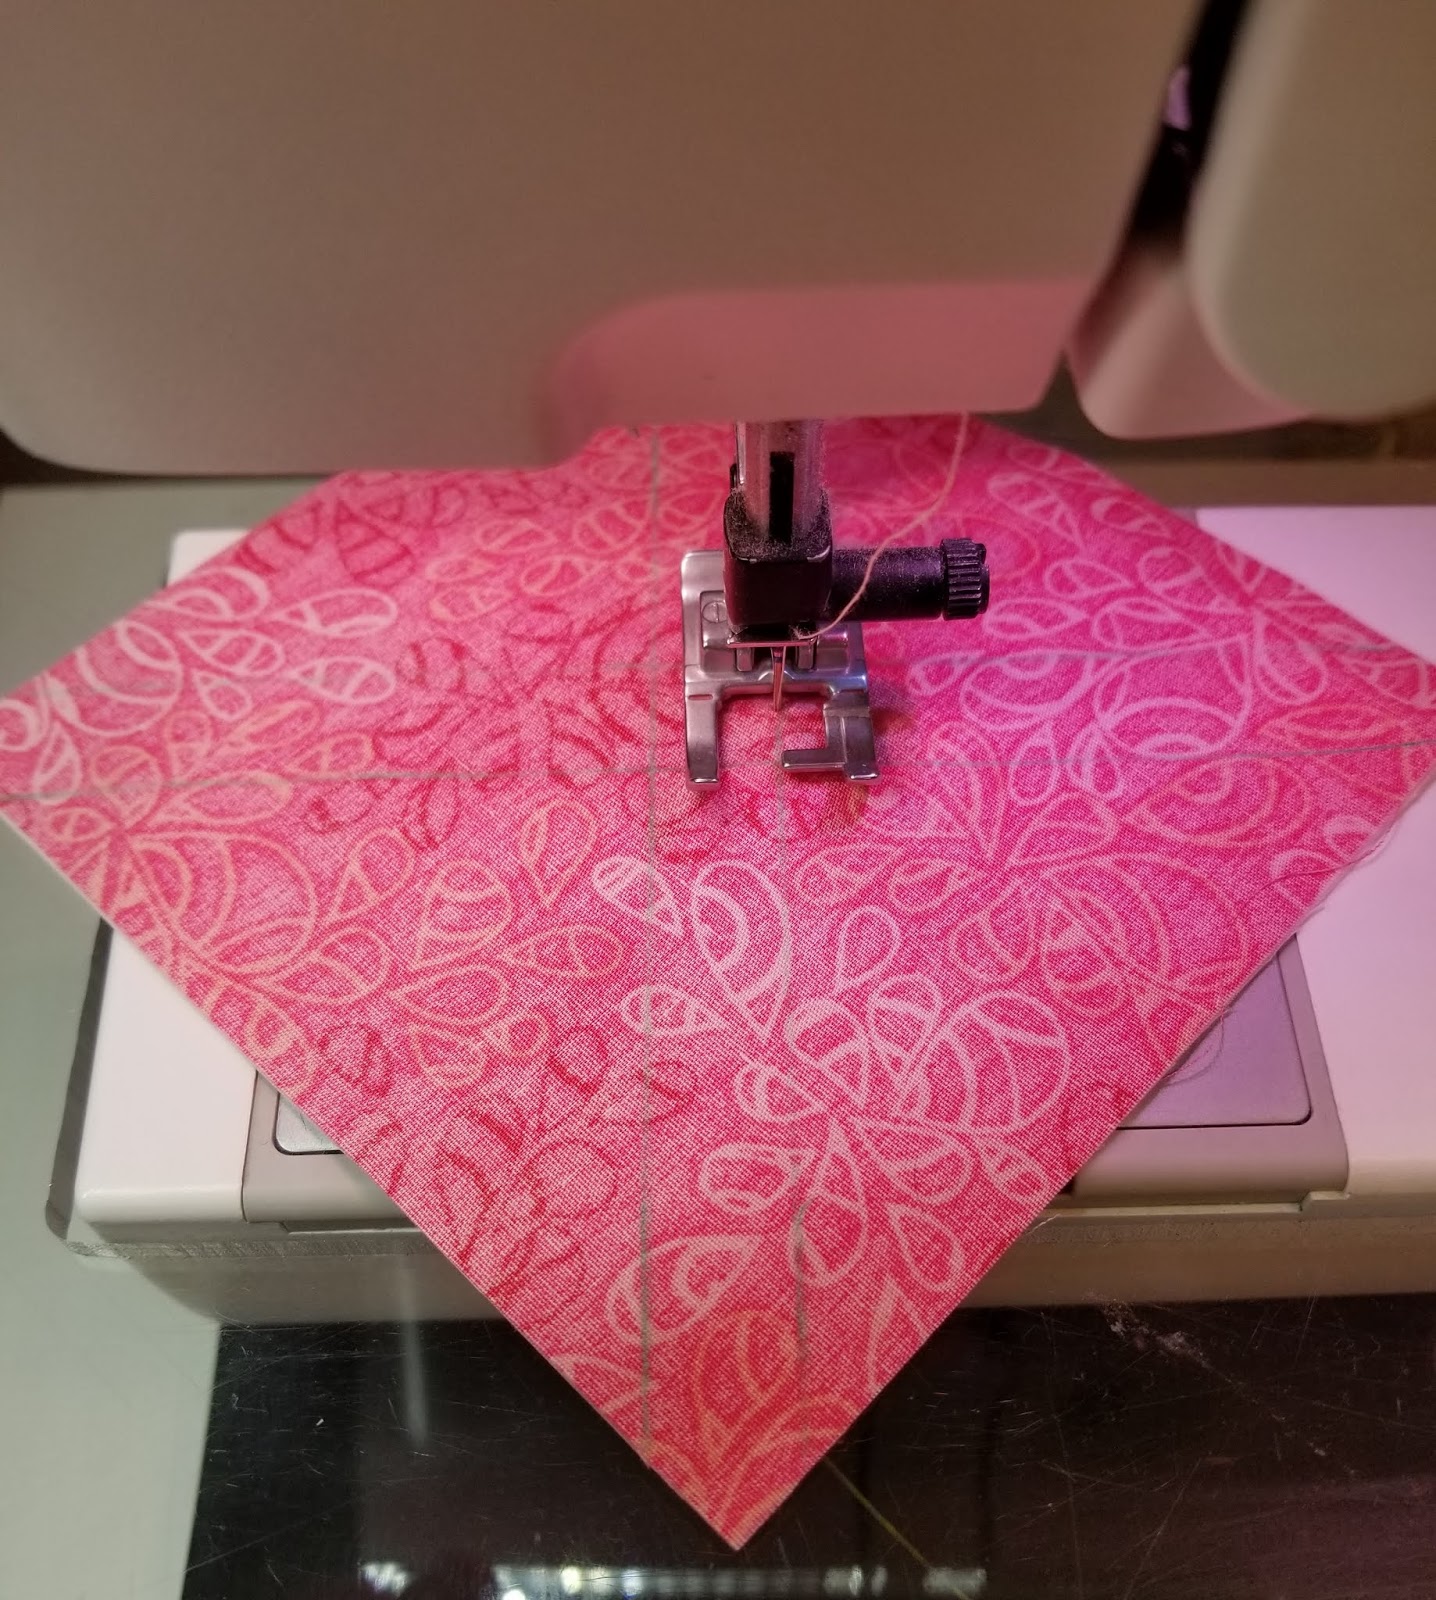
3. Position the pair of squares under your sewing machine needle so that you will be stitching down the marked line on the right first. Stitch down the right side to the middle, cross over at the halfway point, then continue stitching down the left side.
 4. Then rotate the pair of squares and repeat the same stitching sequence on the other set of marked diagonals. Stitch down the right side first, cross over at the half way point, then stitch down the left side. Just keep repeating: “Right, cross, left. Right, cross, left.”
 5. Cut the squares in half on both diagonals, directly from corner to corner. Press the seams towards the background triangle, be very care not to distort the long bias edge.

6. Pair the remaining (4) dark Half Square Triangle with the units from above.
 7. Stitch. Center the pieced triangle section right sides together with the unpieced triangle aligning long bias edges. Stitch with a 1/4” seam. Be careful not to pull or distort this bias edge. Press your seams toward the dark fabric, the large half square triangle.
 8. Trim. Position Tucker Trimmer® over the unit, carefully aligning both the Common and 3 ½” Sizing Diagonals with the sewn seams and trim. Trim the quarter square triangle corner first, then rotate 180° and align the diagonals and cut size lines with the previously trimmed edges and trim the large half square triangle portion second.

 9. You will now have (4) Non-Mirror Combo Units.
Love this, check out the Technique Sheet! Click Here!
Next!! The Popped Rectangle. You are going to love this Corner Pop tool, but Studio 180 Design. You can use it whenever you need a flipped corner. No more drawing lines or wasting an the unit. Check this out!
1. Gather the (4) Dark Rectangles and the (4) Background Half Square Triangles (these will become your replacement triangles.
2. Position the (4) rectangles right side up on your cutting mat, vertically for right handed quilters, horizontally for left handed quilters. Using your Corner Pop® tool, and the proper size Cut Away Corner line.
3. Position the ruler over the corner of your rectangle, aligning the corner with the proper size cutaway lines on the tool as illustrated in the graphic below. Trim. Repeat for all rectangles.
4. Position and Stitch replacement triangle onto base. Center one 2 ¾”” half square replacement triangle with its long side on the just trimmed corner of each base rectangle and stitch using an accurate ¼” seam. Press seams toward the replacement triangle.

27. Trim. Position the Corner Pop® tool on the Popped Rectangle Unit to trim down the newly added corner using the 1 ½” Corner Trim Down line. Align the diagonal guideline with the newly sewn seam and the ruler edges with the raw edges of the unit and trim. Repeat for all (4) Popped Rectangles.
How Tada!
My other advice for this block, and is in the download, you need to assemble so of the unit together prior to putting the entire block together. Make (4) of the Center Unit and (4) of the Corner Unit. Please do not try and lay this entire block out, put these units together first, it will save you several glasses of wine!
Once they are together, then this block comes together easily, as you really only are putting a large Nine-Patch together!

I hope you enjoy the challenge of this block as much as I do. I really love this block!
Well, I have to get back to work. I have to pack and head up to Otis, MA to teach Lightning tomorrow. Then mid-next week, I head up to Vermont Quilt Festival! Where I'm teaching Sparkle, Spring Bouquet, Bloom and In Flight! I hope to see some of you there!
Keep Stitching, Michelle
This week's block is fabulous. It is Peony and Forget Me Nots, published by Nancy Cabot in the Chicago Tribune, November 19, 1936. This block is very striking with its non-mirror combination units, stepping patches, and popped rectangles.
 |
| Block 21~ Forget Me Not ~ Fabric Selection 1 |
Speaking of techniques, this week I have 2 new techniques for you. We are going to make Non-Mirror Combo Units with our Tucker Trimmer! Then, we are going to make Popped Rectangles using a "new to the series" Studio 180 Corner Pop! I will provide you with the instructions that you need for this week's block, but know that there is a fabulous tech sheet to help you make when making other Non-Mirror Combo Units.
Lets get started! Remember measurements are in this week's download, which is only available through Thursday, June 21st.
Non-Mirror Combo Units:
1. Gather the Background Squares and the Medium squares
2. Layer. Place the Medium square right sides together with the background square and align the raw edges. Press them together with a bit of steam to help hold them in place. With the Medium on top, mark four diagonal lines that are ¼” on either side of the true diagonals. Highly recommend using the Quilter’s Magic Wand™ for this task.

3. Position the pair of squares under your sewing machine needle so that you will be stitching down the marked line on the right first. Stitch down the right side to the middle, cross over at the halfway point, then continue stitching down the left side.
 |
| Start on the right line |
 |
| Go to the midpoint the turn and stitch over to the other line |
 |
| Once on the left side, stitch to the end |

 |
| After that quarter turn of the fabric, start on the right again. |


6. Pair the remaining (4) dark Half Square Triangle with the units from above.


Love this, check out the Technique Sheet! Click Here!
Next!! The Popped Rectangle. You are going to love this Corner Pop tool, but Studio 180 Design. You can use it whenever you need a flipped corner. No more drawing lines or wasting an the unit. Check this out!
1. Gather the (4) Dark Rectangles and the (4) Background Half Square Triangles (these will become your replacement triangles.
2. Position the (4) rectangles right side up on your cutting mat, vertically for right handed quilters, horizontally for left handed quilters. Using your Corner Pop® tool, and the proper size Cut Away Corner line.
 |
| Right Handed |
 |
| Left Handed |
3. Position the ruler over the corner of your rectangle, aligning the corner with the proper size cutaway lines on the tool as illustrated in the graphic below. Trim. Repeat for all rectangles.
4. Position and Stitch replacement triangle onto base. Center one 2 ¾”” half square replacement triangle with its long side on the just trimmed corner of each base rectangle and stitch using an accurate ¼” seam. Press seams toward the replacement triangle.

27. Trim. Position the Corner Pop® tool on the Popped Rectangle Unit to trim down the newly added corner using the 1 ½” Corner Trim Down line. Align the diagonal guideline with the newly sewn seam and the ruler edges with the raw edges of the unit and trim. Repeat for all (4) Popped Rectangles.
 |
| Right Handed |
 |
| Left Handed |
My other advice for this block, and is in the download, you need to assemble so of the unit together prior to putting the entire block together. Make (4) of the Center Unit and (4) of the Corner Unit. Please do not try and lay this entire block out, put these units together first, it will save you several glasses of wine!
 |
| 4 Center Units and 4 Corner Units |

I hope you enjoy the challenge of this block as much as I do. I really love this block!
Well, I have to get back to work. I have to pack and head up to Otis, MA to teach Lightning tomorrow. Then mid-next week, I head up to Vermont Quilt Festival! Where I'm teaching Sparkle, Spring Bouquet, Bloom and In Flight! I hope to see some of you there!
Keep Stitching, Michelle


Comments
Post a Comment