Block 5 - Summer Winds and Stash/Scrap Management
 |
| Grandmom & me |
When I started this series, I had hoped that I’d get 100 of
my students to follow along with me. You all have blown me away.
Many have asked how I thought of this idea. Well last fall, while straighten up my Quilt Studio, I came across my
grandmother’s “under the bed box”. The
day was lost to me looking through her clippings. Running my hand over the same pages she had touched and marked, and on many of days would stories about the blocks with me. Missing her more than ever, I wondered if she
would be happy with the direction I’ve taken with my life. I started to organize the clippings, placing
them into archival page protectors. A
few weeks later, I was at Quilt Market, fielding questions from a book
publisher. She asked me if I had any
ideas for a book, I thought she would think I was crazy, but she loved it! I wanted to share some timeless blocks, but
add a twist to them, tell a bit about their history, share a little about my
grandmother, and to write instructions that people could actually enjoy. To test these blocks, they agreed to let me make
them available for 1 week only. So, that
is why they are only available for a week.
I have been astonished by the number of people following
along! I cannot believe the
response. The number of downloads have
been incredible, but the posting and emailing of the finished blocks have just
boggle my mind. I love seeing what all
of you are coming up with! Please keep sharing on the Facebook Page.
I hope you are all taking the time to read the blog posts as well. I try and share some good tips and tricks that will help you with your block construction. On to this week!
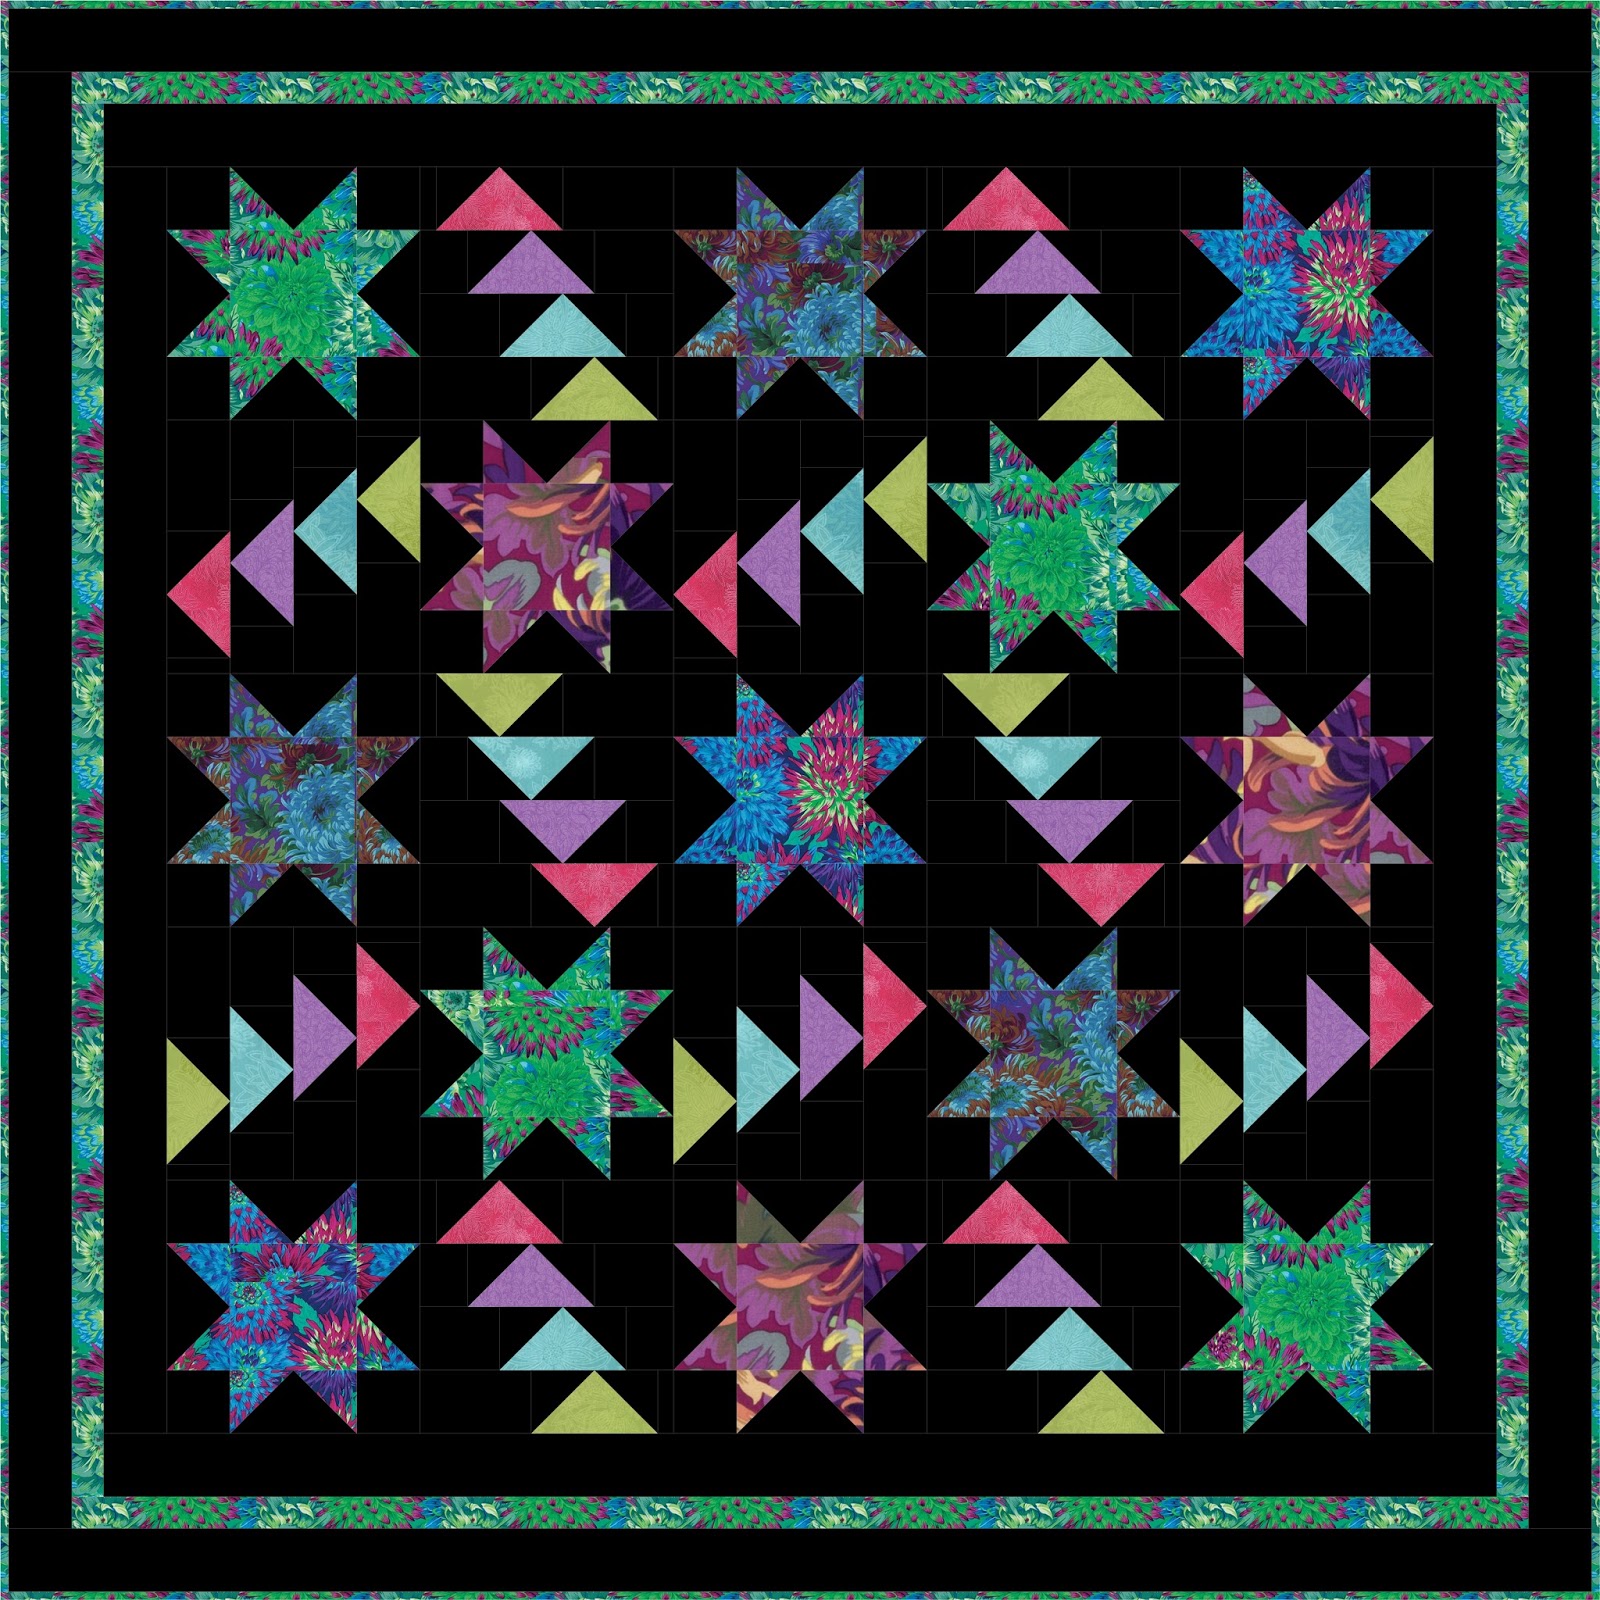
This week’s block is Summer Winds, which is credited to
Nancy Page, but unfortunately is an unidentified newspaper clipping, and was
not dated. I debated skipping this
block, but I loved it, especially the name.
I did find similar blocks, one being Summer Nights, in Farm Journal and
Farmer’s Wife, ca 1934. Summer Nights,
was made using the same units, but she rotated the flying geese 180 degrees and
had a variation in color placement and shading.
Summer Winds is also similar to the block known as the Double X’s No.4,
credited to Nancy Cabot, Chicago Tribune, 1935.
Nancy Cabot created the center as a square³ (square-in-square-in-square
– aka Economy block).

The block is made up of Flying Geese and Half Square
Triangles (HST). We are going to use the
Eight at Once technique, which we learned last week, for most of the HSTs. Plus, I am introducing a new tool and
technique, to make the Flying Geese, to the Timeless with a Twist series. The technique is known as the “Fast Four”
method, we will make four Flying Geese at once, slightly oversized, and trim them
down with the Studio 180 Design’s Wing Clipper.
In the Fast Four method you will use one large square for
the large triangle (I often refer to it as the main body) and four small
squares for the small triangles (I often refer to them as the wings).
In the download, I provide step-by-step instructions, which
are very easy to follow. The instruction
in the download, and those that came with the Wing Clipper tool, will talk
about nudging the small squares in a few threads from the edge. This really does work well; between the
slightly oversized cutting instructions and the nudging of the small squares,
it usually provides enough of a margin to succeed. However, if you find that you still struggle
with making the flying geese, try this tip:
Tip: In place of nudging, just cut those small
squares 1/8” larger and line them up with the edges. You will succeed, and may have a little
extra to cut off!
 |
| In Flight Pattern |
In my new pattern In Flight, I suggest the tip above,
especially for the large sizes. In Flight, released a few weeks ago, is made entirely
with just one tool, the Wing Clipper. My In
Flight patterns offers 4 sizes and at least 4 settings. Check it out:In Flight Pattern
As I stated above, the step-by-step instructions areWing Clipper in the download, but I
have a few other tips when working with
Tips:
·
Draw the 2 lines on all of the small squares
before placing them onto the larger square.
Use the Quilter’s Magic Wand and a good fabric marking tool (I love the Sewline ceramic chalk mechanical pencils). Using
those 2 lines to line up the small squares, similar to railroad tracks, when
you place them on the large square, will help you to keep those squares evenly
placed.
·
Remember, when you go to trim down the Flying
Geese units, you always want that “valley” to point to your belly first (if you
are right handed) and toward the right side, if you are left handed. Trim those two exposed sides, then rotate the
unit 180 degrees, line up with the cut size and then trim the remaining 2
sides.


For this week’s fabric selection section, I’m going to
briefly cover my first two fabric selections and then talk a little more about
my 3rd and 4th fabric selections. Yes, I added a 4th fabric
set! I couldn’t help myself! I’ve been making a KFC scrap version since
the get go, but I decided to start an Alison Glass scrap version last week. Every time I pulled my KFC scrap bin, I felt
guilty about not pulling out my Alison Glass scrap bin. Since I haven’t been purchasing Alison Glass
as long as KFC, I did need to include some orphan Fat Quarters left over from a
few projects.
 |
| Michelle's Fabric Selection #1 |
 |
| Michelle's Fabric Selection #2 |
 |
| Michelle's Fabric Selection #3 |
 |
| Michelle's Fabric Selection #4 |
Let’s talk a little bit about Scrap Management. I know I used to struggle with it. Believe me, there are by far other Quilters
out there who probably have far better scrap management than I do, but what I
do works for me. I think that is an
important statement, you have to find
something that works for you. If you
create a difficult-for-you process, you will be less likely to actually do
it.
First you need to define
what a scrap is; what a scrap is for me and what it is for you might be different.
In my studio;
·
Anything
smaller than 2” x 2” goes in a fabric collection bin that gets used as
stuffing to make dog beds for shelters or I send to an organization that makes
beds for shelters.
·
Anything
smaller than a 4” x HWOF*, but larger than 2” x 2”, goes into a large basket
that I pull from to make demo units.
Most of you will not have this, so you might make use of those scraps in
the next category. *HWOF - half width of fabric – typically from a fat quarter or fat
eight.
·
Anything greater
than 4” x HWOF, but less than a Fat Quarter, gets stored in bid, grouped
the same way I group my fabric.
·
Fat
Quarters are stored together and grouped the same way I group my fabric. I consider fat quarters to be stash.
o
You may collect fat quarters or have them left
over from a project; says the project calls for a fat quarter, but you use/take
a ½ yard and cut it into 2 fat quarters, use 1 FQ in a project, and then you
have 1 leftover as scrap.
·
Greater
than a Fat Quarter is stash yardage.
I stored my fabric stash and scraps basically the same
way. The big difference is that I store
my stash on Fabric Organizers. I group both of them by “Style”, then by “Size” and finally by
“Color”.
Think of a Quilt Shop, that is basically how I break my
fabric it into “Style”, more below.
Then, my “Size” groupings are; Yardage, Fat Quarter, or Scraps. My “Color” groupings are arranged similar to
the color wheel.

I approach my “Style” categorization almost in a filter-type
approach:
1.
Showcased designer and/or fabric manufacturer
o
I have a few designers that I follow and adore
their fabric. If the fabric is from one
of those designers, I keep it all together.
o
If the fabric is from one of “my designers”, I
keep them separate and grouped the fabric by designer (examples- KFC (Kaffe
Fasset Collection), Alison Glass, Art Gallery (Pat Bravo/Bari J), Amy Butler,
Jo Morton, etc), then by size and color.

2.
Batiks
o
Store by size and color.
3.
Solids
o
Store by size and color.

4.
Blender
o
These are tone-on-tones. I have TONS of them! I may actually need a program soon!
o
Store by size and color.
5.
Novelty
o
Store by Holiday, Theme, etc. then color.
6.
Everything else
o
Stored by size and color.
I know some Quilters will tell you to cut down your scraps
into specific sizes and place them into bids with like sizes. I think if this is something that you feel
you can manage and can actually keep up with, then you should try it. For me, I have way too many scraps and not
enough time, so I’ve found just stacking partially strips and strips grouped
into the categories I mentioned above works for me. I just pull out my bin, pull out strips that
I think may work, arrange them by color way, and then audition them.

I hope this has helped. When I give lectures to guilds, I often
get questions about my stash organization.
Having my scraps and fat quarters organized in the manner above really
helped me easily pull them out for both my KFC and Alison Glass version.
Back to this week’s block.
The most difficult part of this week’s block, Summer Winds, may be
sewing the units together. Often I have
you sew the corners together first into corner units (last week), however, with
Summer Winds, I found that it was easier to deal with the pressing directions
by laying out the block, taking a picture.
Don’t forget to look at that picture, it will help you find something
you may have in the wrong direction.
Then, sew the units into rows.
Please, pay close attention to the arrows I placed on the diagram. Then, sew the rows into the block, and those
are going to get pressed open. The seam stick will really be a life saver for this
step.
Well, I think that is it for my tips for this week. I hope you are all loving this as much as I
am. I love to hear feedback. Please feel free to leave comments
below. If you are participating in the
series and are a member of Facebook, I would love for you to join our group.
So, go get the next clue!
I think we could all use some Summer Winds about now!
Download: HERE
Keep stitching!
Michelle


Comments
Post a Comment